Thursday, November 8, 2012

Grain Free "Oatmeal"


I walked into my cold kitchen the other morning and all I could think was I wanted something warm and comforting for breakfast.... something like oatmeal.  Of course breakfast cereals are totally out of the question for me, but I remembered seeing some Paleo recipes here and there for "n'oatmeal" or other similar types of non-oatmeal. I looked around but none seemed too appealing. I try to cycle nuts and seeds and not rely on one or the other a lot, so I decided to use a mix of sunflower and pumpkin seeds.

Anyways, turned out pretty well! Definitely an oatmealy consistency and did the job. I used my Blendtec to blend it all for about 40 seconds. I didn't mind still having little bits in it since oatmeal itself has little chewy bits in it too.

*One other thing- I blended a cup each of sunflower and pumpkin seeds but only used half so that it would blend better and that I could easily/quickly make it another time.


Grain Free "Oatmeal" Breakfast Cereal
(seed mixture makes 2 batches)

1 cup sunflower seeds
1 cup pumpkin seeds (pepitas)
1 Tbsp chia meal (ground seeds)
1 cup Coconut Milk 
1 very ripe banana (mashed)
1 tsp cinnamon
1 tsp vanilla
2 tsp maple syrup 

In a blender or food processor, pulse or blend your seeds until a fine meal. (Don't overblend or it will turn into seed butter.) Mix it well.
 
In a medium size pot, add 1 cup of the blended seed flour (you will have 1 cup left over) with the rest of the ingredients and mix well. Turn on the heat and cook over medium heat for about 6-7 minutes until it has reached your desired consistency. If too thick, add more coconut milk.

Serve hot and top with your favorite toppings! I used a frozen organic berry mix from Trader Joe's and some slivered almonds on mine.


Pin It Now!

Thursday, September 27, 2012

Coconut Pulp Bars


I've been making a lot of coconut milk recently which has left me with a LOT of coconut pulp... I've pretty much been composting it, but have been looking for something to do with it because I feel like I'm wasting it. I wasn't able to find any recipes online when I searched, so I decided to try out something myself....

After making my coconut milk, I just store the leftover pulp in the fridge until I'm ready to use it. So if you make coconut milk like me, hopefully this can help you out! 

This recipe isn't very sweet, but you can add more coconut sugar or maple syrup depending on your tastes. I wanted something a bit like a shortbread so that's how it turned out. Hope you enjoy!


Coconut Pulp Bars


1 cup packed coconut pulp (from making coconut milk)
2 Tbsp coconut flour
1/8 cup coconut oil
1/4 cup vanilla coconut palm sugar
1/2 tsp almond extract
1/2 tsp psyllium fiber
2 Tbsp boiled water

Preheat oven to 375 degrees. 
In a food processor, pulse the coconut pulp a few times to break up any clumps.
Add in dry ingredients and pulse until mixed.
Add in the oil, almond extract, and hot water.
Mix until well incorporated.
Spread into a parchment paper lined loaf pan.

Bake for 20 minutes. When done, lift out of pan with parchment paper and place on cooling rack.


Once cool, slice and serve with a hot cup of tea or coffee!

Optional Topping

Mix one part Coconut Cream Concentrate with one part maple syrup for a delicious frosting. 


Pin It Now!

Tuesday, August 28, 2012

End of Summer Green Popsicles

I don't know about you all out there, but the summer has flown by for me... I didn't realize how little I've blogged but I guess it's just the sign of spending wonderful time outdoors and not in front of the computer :)

The weather is still warm here for a bit longer and my daughter has been loving our homemade "ice-smoothies" as she calls them, so I thought I would share our recipe for them.  We often drink green smoothies for breakfast so I just froze them and they make an awesome treat packed with great nutrients and delicious too! Adding and avocado makes it extra creamy and a little less icy than if you just freeze liquids so I really love having it in there. Of course you can add/subtract whatever you like but I find this balance to be not too sweet but still fruity and cooling.


Creamy Green Popsicles

2 leaves kale (aproximately 2 cups)
1 cup organic spinach
1 avocado
1 cup coconut milk (canned is creamier)
1 apple (sliced, cored)
3 clementine oranges
1 cup mango
2 Tbsp ground chia seeds
1 tsp Spirulina powder

Blend all ingredients in your blender until smooth. Pour into Ice Pop Molds and freeze upright for a few hours or overnight.


If you have leftovers, enjoy as a smoothie!


Pin It Now!

Tuesday, June 19, 2012

Strawberry Tart (Gluten/Grain Free, Dairy Free, Soy Free, Egg Free)

 
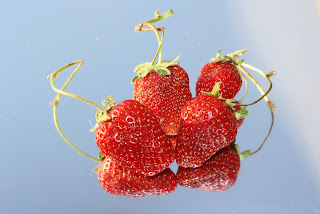
We went strawberry picking a few weeks ago and I knew I wanted something creamy to go with them but I didn't have a lot of time... instead of coming up with a totally new recipe I just based it off of the recipe for my Pear and Fig Coconut Cream Tart that I made last fall.  It's a bit different because I didn't bake it all together, but that's definitely an option if you want something a little different!  This tart is light and creamy and not too sweet- it lets you taste and enjoy the sweetness of the strawberries as well.


So to keep things simple, here is the recipe!


Strawberry Tart
Gluten/Grain/Dairy/Soy/Egg/Corn Free


Crust
2 cups almond meal
1/4 cup coconut oil
1 Tbsp chia meal in 2 Tbsp hot water
1/8 tsp celtic sea salt
1/4 tsp cinnamon

Cream
1/4 cup honey
1 tsp vanilla
1 can full fat coconut milk
1/4 cup arrowroot flour

Strawberries for decoration

Pre-heat oven to 350 degrees.
 
Prepare your crust:
Mix your chia and water and set aside to gel. Mix all of the ingredients together with a fork or whisk and press into a 9.5" tart pan(mine has a removable center). Place crust in the oven and bake for approximately 20 minutes. Remove from oven and set aside to cool.

Cream:
Over medium heat, warm your coconut milk, honey, and vanilla.  Once it is about to boil, whisk in your arrowroot.  Remove from heat and pour into tart shell.


Place in the refrigerator to firm up and cool off.  Gently place your fruit onto the coconut cream, remove from pan, slice and serve.

Enjoy!


  Pin It Now!

Monday, June 11, 2012

Blueberry Walnut Breakfast Cookies (Gluten/Grain Free, Soy Free, Egg Free, Dairy Free, Sugar Free)


Breakfast has always been a challenge for me... and now I've had to cut out sugar the past couple weeks (except for a bit of fruit) which has actually been okay, but I do use dates in a lot of things, especially breakfast foods. I was trying to come up with an easy but tasty, not too sweet option. I saw a few recipes here and there that might work but they they still weren't quite right, so I combined a couple ideas and came up with these "breakfast cookies" or "biscuits" as we like to call them at home since our rabbit is named cookie :) Probably the most inspiration for these came from Against all Grain, so check her's out as well if you want something even sweeter or with eggs.

I have enjoyed making this recipe because it's a one bowl kind of recipe- I just throw it all in the food processor and it's only one thing to clean!

Blueberry Walnut Breakfast Cookies 
Gluten/Grain Free, Soy Free, Egg Free, Dairy Free, Sugar Free

1/4 cup Organic Coconut Flour
1/2 cup Almond Butter
1/2 large banana (approx 4 inches)
3/4 cup Organic Shredded Coconut
1/2 cup unsweetened apple sauce
2 Tbsp chia seed meal + 1/4 cup boiled water
1 1/2 tsp cinnamon
1 tsp vanilla
1/4 tsp sea salt
1/2 tsp baking soda
1/4 cup chopped walnuts
1/2 cup frozen organic blueberries

Preheat your oven to 350°F. Prepare your chia meal by adding the boiled water to the chia and stirring with a fork. Set aside. Place the coconut flour, almond butter, and banana in the food processor and blend until uniform. Add in the rest of your ingredients except the walnuts and blueberries and pulse until it is well combined. Add the walnuts and blueberries and pulse a few times just until incorporated. 


Take the dough and make approximately 2" balls in your hand and lightly flatten into 12 disks, placing on a large greased, parchment, or silpat-lined baking sheet. 


Bake in the oven approximately 15 minutes until the edges are golden. Cool on wire rack before eating then enjoy! These stay well in the refrigerator for up to 5 days or so and can be frozen as well. I enjoyed them straight out of the refrigerator or reheated in the toaster oven. I don't have a microwave, so no idea how they reheat in there!


Enjoy!


 This recipe is also being entered into the Friday Foodie Fix at The Whole Gang - this week's theme is Blueberries!!


Pin It Now!

Monday, May 7, 2012

Beet, Dill, and Avocado Salad (gluten free, dairy free, soy free)


I love vegetables... always have. But there was one I never quite liked. (okay two- the second was turnips). It was BEETS. My mom always has pickled beets or boiled beets on the table at dinner and every now and then I would "check in" with them to see if I had developed a taste for them and still... no.

Then last summer my cousin Samira made this beet and avocado salad with dill on it so I was like- oooh let me give the good ol' beets a try again! And what do you know... victory! I ate so much of it and then I came home and asked her for the recipe to make for my daughter's first birthday party and her response was add some lemon, olive oil, salt, pepper, and dill together. So I did that and have a few more times. So now I just thought I would share with you the deliciousness of this combo because I actually did some measurements, but feel free to add more of this or that according to your tastes. I think they go well together because the avocado is soft and the beets slightly hard, a bit tangy, and herb-y all at once. If you don't like fresh dill, add chopped basil- either would be great! It's great for spring and summer picnics and a refreshing yet filling salad.

Avocado, Dill, and Beet Salad 
(gluten/grain free, soy free, dairy free, nut free, egg free)

4 medium cooked beets (I steam mine)
2 avocados
4 Tbsp fresh organic lemon (1 large lemon)
2 Tbsp olive oil
1/2 tsp freshly ground pepper
1/2 tsp sea salt
2 Tbsp fresh chopped dill (or basil)

Chop your beets into cubes and put in a bowl. Cube your avocado into similar sized pieces and place on top of the beets. Add the rest of your ingredients on top and stir just enough to mix. Taste and adjust to taste. 

If you over-mix, your avocado will turn as red as the beets and get mushy so be gentle!

Enjoy!


***Update: 6/27/12:

This is also amazing with one or two chopped champagne mangoes as well!!


I used Chioggia Beets in this picture, and they don't bleed as red beets do.


Pin It Now!

Tuesday, April 24, 2012

Sweet Potato & Black Bean "Sausage" (vegan, gluten free, soy free, egg free)


I've had this recipe on the back-burner for a few months now... I made this for a brunch potluck and never had a chance to work on my modifications and revise it. I based it off of this recipe by the Gluten Free Cooking School - the original recipe includes brown rice and is fried, so I modified it to bake it and replaced the rice with sweet potato and a few other adjustments here and there... My friend Anne said I hijacked this recipe so this is dedicated to you Anne- sorry it took so long! :)

You can still fry this recipe if that's your thing, but I thought it was easier, faster, and healthier to just bake them.  My daughter loves these and they make a great snack or meal- whichever you're in the mood for!

I tried baking it straight on a greased cookie sheet and using a Silpat/Silicone Linerand the ones straight on the sheet turned out a little better (crispier) but either will definitely work. You can make either links or patties out of these and the cooking time is the same.


Sweet Potato & Black Bean Sausage

(gluten free/grain free, soy free, dairy free, nut free, egg free)

1 1/2 cup sweet potato, cooked
2 cups cooked black beans
2 tsp grapeseed oil
1/4 cup chia seed meal (ground seeds)
4 tsp onion powder
2 tsp rubbed sage
1 tsp fennel seed, ground (I used a mortar and pestle)
1/2 tsp granulated garlic
1 tsp salt
1/2 tsp black pepper
1/2 tsp cumin

-Pre-heat your oven to 375 degrees and prepare a baking sheet.
-Combine the black beans, sweet potato, and oil in a food processor. Pulse until all items are well combined - you will need to stop it and scrape down the sides a few times. Should be a creamy mixture.
-Scoop the bean mixture into a mixing bowl and add the chia meal and spices. Stir well to combine.
-To make the patties and/or links, divide the bean mixture into 24 pieces and rolleach piece into a ball and place them onto your baking sheet. If you want patties, gently smash them down onto the tray. If you want a link, roll the ball between your two palms until it is a log shape.
-Bake in the oven for 12 minutes, remove, flip them over, and place back in the oven for another 10 minutes. Remove from oven and let cool in pan for a few minutes then enjoy! 

**These can be stored covered in the refrigerator and eaten warm or cold or frozen and re-heated at a later time.

Before Baking
   Pin It Now!

Sunday, March 4, 2012

Spinach Bites (gluten free, dairy free, egg free, soy free, nut free)


Since having my daughter I feel that a lot of my recipes have shifted quite a bit- I've moved towards simpler foods that are prepared quickly but can be adapted for whatever mood you're in.

When I found out that my daughter had an egg allergy it wasn't a huge issue for me since I was already familiar with egg replacers, but definitely flexed my cooking/baking muscles a bit more than normal! My daughter eats a lot. A LOT :) So I'm always looking for snacks that I can give her without compromising our desire to have her eat healthy. As I've mentioned in other posts like this one or this one, finding snack foods for little ones that aren't full of fillers, sugars, or fortified with unnecessary vitamins is quite difficult!

I had spotted Dr. Praeger's spinach littles and broccoli littles in the store, but they had egg whites in them so that was a no-go. I adapted the ingredients a bit to suit our tastes, but you can of course adjust the seasoning to you or your child's preferences- we tend to like food with a lot of spice (my daughter included). I make a bunch and just store them in the freezer (info below) to re-heat whenever she needs a quick and healthy snack.

A note about shapes: This recipe does take a bit of work if you wish to make shapes like I did in the pictures. If not, just plop little portions onto your baking sheet and bake! You can also use a mini cupcake tray or silicone cupcake holders. I used a Mini Noah's Ark cookie cutter set that I found at Joann Fabric (also available at Amazon as well as one of my favorites. If you have high cookie cutters just be aware that cooking time will vary.

Spinach Bites - for babies, toddlers, kids, or anyone!!

(egg free, gluten free/grain free, dairy free, soy free, nut free)

1 cup cooked & mashed organic potatoes (2-3 small potatoes or 2 cups raw cubed potatoes)
2 cups frozen organic chopped spinach
2 tsp flax seed meal + 2 Tbsp boiling water (mixed in small bowl)
1/4 tsp onion powder
1/4 tsp garlic powder
1/8 tsp Herbamare Organic Herb Seasoning
1/8 tsp pepper
1/8 tsp sea salt
1 Tbsp Grapeseed or Canola oil

Pre-heat your oven to 350°F.
1. Cook your potatoes in a small pot of boiling water with a bit of salt added. When done, drain and place in a mixing bowl.
2. Steam or lightly cook your spinach. Blend until creamy**. Add to potatoes.
3. Make your flax egg: mix the flax with boiling water and let sit to gel while you prepare the rest of the recipe.
4. Add the spices and oil, mash and stir well. Add the flax egg and stir until combined well.
5. Place on silpat/Silicone Liner or Unbleached Parchment Paper lined baking tray and bake for 40 minutes. Cool on a cooling rack and then serve!
**I usually blend the spinach, but you can also leave it unblended but it will look different and the spinach will be more obvious (see pictures below).


With blended spinach
With un-blended spinach
To store:
Keep in the refrigerator in a sealed container.
To freeze for later snacks- cool and freeze in storage bag/container.

To re-heat:
Place on foil-lined tray in a toaster/convention oven and warm. Alternately, if you run them under cool water for a minute and then place in the toaster oven they thaw MUCH faster and will be ready within a minute or two. I don't have a microwave so I can't tell you how they come out from there :)

Pin It


Pin It Now!

Thursday, February 16, 2012

Easy Grain Free Flatbread 2.0


Thank you to everyone for their kind comments and suggestions about my Grain Free Flatbread. I've received a lot of questions about options that I had not experimented yet, so if you have, please let me know! Either via my Facebook page, comments on the post, or email.

I did end up trying to use both chia and flax as people suggested, but neither worked to make a flexible bread. Instead they became (delicious!) crackers much like my Coconut flour and Chia crackers. The psyllium in this recipe really provides the flexibility and binding that is needed for an egg-free, grain free, gum free bread. If you don't need these restrictions you can probably try using one of them and it will most likely work. The other substitution that I've tried and worked is light olive oil for the coconut oil. 1/4 cup should work but I still preferred the coconut oil because the olive makes it dry out faster.

I wanted to share one more variation I made shortly after the first that did work. I thought I would try using less psyllium to see if the taste mellowed out a bit- and it did. The only thing that is sacrificed is its ability to roll. So this bread can fold over (see the pictures) and still serves as a great sandwich bread, but won't wrap like the first. In short, you just lessen the amount of psyllium, but I'll go ahead and give the whole recipe again to make it easier :)

Easy Grain Free Flatbread 2.0 (the non-rolling version)
grain free/gluten free, dairy free, soy free, egg free, nut free, vegan


1/2 cup Coconut Flour
1 TBSP
Konsyl Psyllium Fiber Powder
1/4 cup
Coconut Oil
1 cup boiling water


optional:

1/8 tsp sea salt

1/8 tsp granulated garlic

1/2 tsp Italian seasoning herb blend

your favorite herb/seasoning

Whisk the coconut flour and psyllium together in a bowl along with the salt and herbs if using. Add the coconut oil. Add the hot water a little at a time, stirring as you add it (will melt the coconut oil). Mix well quickly making sure all the dry bits are incorporated and looks uniform. Using the back of a spoon is helpful.


Roll (with rolling pin) or pat (with moistened spatula) the bread out on a Silpat/
Silicone Liner or unbleached parchment paper-lined jelly roll pan until thin and even. The dough is forgiving, so feel free to move pieces around and repair patches as you go along. I tried baking as two separate pieces and as one large bread and both worked out well.

Bake at 375º for 15-20 minutes depending on your oven and how thin you've rolled the bread. (Mine was about 11"x12" for 15 minutes.) Transfer to a cooling rack and allow to cool to room temperature before slicing/eating.


The taste will mellow out the longer it cools and sits out. Store in ziplock or other sealed container (if you don't eat it all at once!).


Pin It

Pin It Now!