Showing posts with label soy free. Show all posts

Monday, April 14, 2014

Baklava Cinnamon Rolls (Paleo, Grain/Gluten Free, Egg Free, Dairy Free, Soy Free)


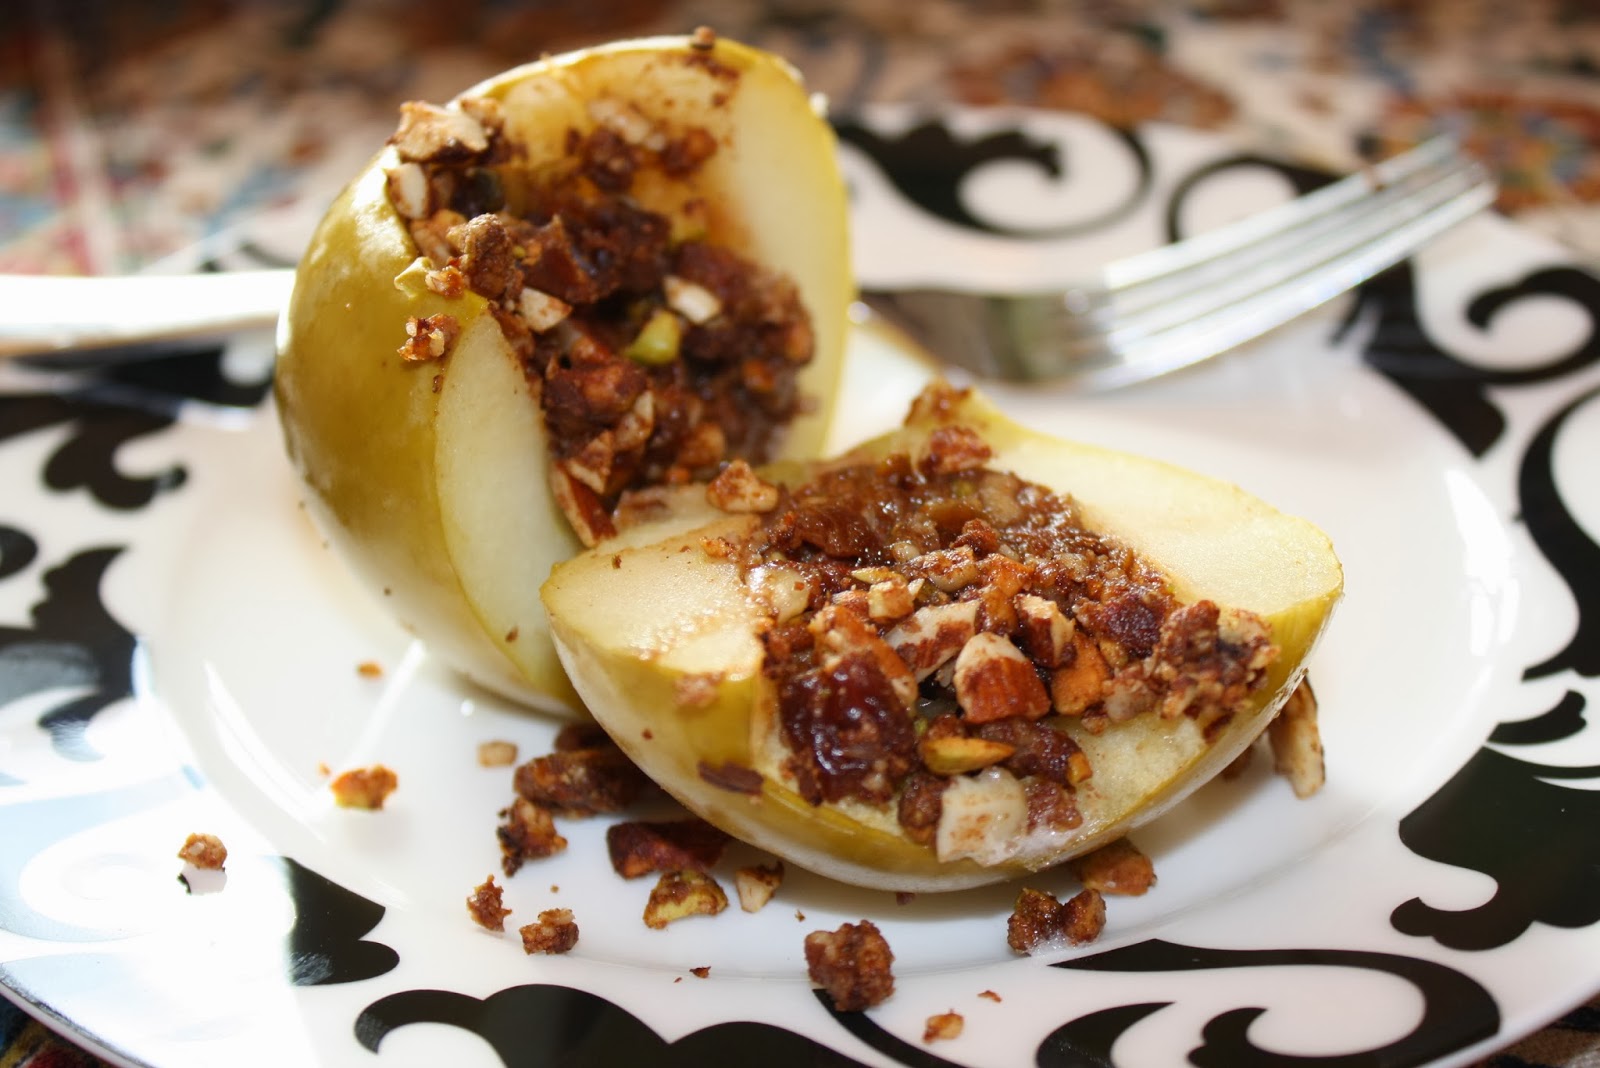
This past weekend I made one of our favorite weekend treats- my recipe for Baked Apples. I ended up having a lot of leftover filling that I kept snacking on for the next few days. Something kept reminding me of baklava though, and more specifically, my Baklava Cake, and I'm guessing it was the pistachios... Anyways, I've been meaning to make my Cinnamon Rolls for a while so decided to experiment a bit in combining recipes. I'm really happy with the way they turned out and excited to share the recipe, especially since it's been a year since I posted it! *Bonus-it's egg free for all of those looking for the rare Paleo egg-less recipe. Hopefully you'll enjoy the warmth of nuts and spices in this special baklava-inspired treat. And if you have extra filling, make some baked apples! :)


Baklava Cinnamon Rolls 
(Paleo, Grain/Gluten Free, Egg Free, Dairy Free, Soy Free)


Dough

Dry Ingredients
2 cups Organic Blanched Almond Flour
1/4 cup Organic Coconut Flour
1/4 cup Tapioca or Arrowroot Starch
1/2 tsp Baking Soda
1/4 tsp Cinnamon
1/8 tsp Sea Salt 

Wet Ingredients
1/4 cup ground Chia Seeds mixed in 1 cup Water
1/4 cup melted Coconut Oil 
1 tsp Rose Water
1 tsp Ground Cardamom
1 tsp Vanilla or 1/2 tsp Powdered Vanilla
2 Tbsp Honey

Filling

1/4 cup Honey (1/2 cup if you like it more sweet)
1/2 tsp Cinnamon
3 Tbsp melted Coconut Oil

3/4 cup blended nuts (see below)

Nuts
1.5 cups of roasted pistachios, almonds, and cashews
6 dates, chopped
1 Tbsp maple syrup
1 tsp vanilla
1 tsp lemon juice
1.5 tsp cinnamon
1/4 tsp nutmeg
1/4 tsp salt
1 Tbsp coconut oil

Pulse all ingredients in a food processor until finely ground and sticky. Set aside.

Pre-heat oven to 350 degrees farenheit.

In medium bowl, add chia meal and water and whisk with a fork until starts to gel. Set aside.

Add dry ingredients to your mixing bowl and whisk/blend until well incorporated.

Add the rest of your wet ingredients to the chia mixture and mix.


Add the wet into the dry and beat with mixture until all the dough comes together.

On a Silicone Baking Liner/Silpat or parchment paper-lined jelly roll pan, roll out your dough until thin. If it sticks to your rolling pin, you can place another piece of parchment paper over it to roll, but I didn't have any problems with it. Or, your dough could be too warm and you could chill it a bit as well. 


Mix the first three filling ingredients in a small bowl and spread over the dough. You don't need to be a perfectionist with this since it will be rolled. Sprinkle the nut mix over the dough.


 You can roll this two ways:

For smaller and more rolls, roll from the long side of the pan. This is what I did and prefer. Lift the edge of the silpat and gently pry the dough off to roll it. Continue to roll gently until you have reached the end, using the silpat to help roll. Then slice with a sharp knife into approximately 1" slices. If it sticks to the knife, wet it a little bit. Place flat side down on pan, evenly spaced. I had 16 rolls this way.


 For larger rolls, roll from the short side of the pan. I have not tested this so I'm not sure how long it will take to bake.

Place in oven and bake approximately 15-20 minutes. Mine baked well at 18, but watch it carefully as the size of your rolls will change baking time. You want it slightly crispy on the top but not hard or dry.

Remove from oven when cooked and cool on baking rack for about 10 minutes until cooled and firmed some, but still warm and gooey.
Frosting:
These are not overly sweet, so if you like, sprinkle some maple syrup over the tops, or I blended equal parts melted coconut butter (coconut manna) and maple syrup and made a bit of a frosting to put on top of some as well. I loved it as it is though, so if you have a sweet tooth, maple or more honey is fine to add either on top or inside.


Pin It Now!

Saturday, October 19, 2013

Baked Apples (Grain/Gluten Free, Dairy Free, Egg Free, Soy Free, Paleo)


Other than the obvious pumpkin everything, nothing says fall to me like apples. Amazingly enough I didn't have my first baked apple until about a year ago so was pretty excited to recreate one at home based on our own tastes and needs...

This is really a recipe you can play around with, and I made two variations- with and without the pecans or using slivered almonds instead of whole. One time I made it I created a lot of extra filling and saved it as well so that I would have have it prepared for the next time I wanted them. I've eaten these for breakfast or dessert- a fantastic, healthy treat for whenever!

Baked Apples
(paleo, grain free, gluten free, soy free, egg free, dairy free, refined sugar free, vegan) 

Coring Apples
There are a few techniques for coring apples. If you have a corer like this one or this one
you can do it pretty simply, but I ended up just using a knife and once I figured out a good technique wasn't a big deal. I inserted my knife and carved a circle in each apple, making sure not to go all the way through. Then, i re-inserted the knife at a diagonal around the circle to remove the core. I then used a spoon to finish removing the core.


Filling

1.5 cups of pistachios, almonds, and pecans (or your favorite nut/seed blend)
6 dates, chopped
1 Tbsp maple syrup
1 tsp vanilla
1 tsp lemon juice
1.5 tsp cinnamon
1/4 tsp nutmeg
1/4 tsp salt
1 Tbsp coconut oil

Pulse all ingredients in a food processor until reaches your desired consistency. Sometimes I like it more chunky (like in the pictures), other times a finer sticky filling. Fill each apple with filling in a pyrex. If you like it a little sweeter, drizzle a little more maple over the tops.


Bake for 30 minutes at 375*F

Makes around 6 medium apples


Pin It Now!

Tuesday, September 3, 2013

Go Ahead Honey it's Gluten Free: "Something Fruity!"


Well, the month of August has come and gone and it's time for the Go Ahead Honey it's Gluten Free roundup. This month features yummy dishes with fruit, great for the summer...

To start off, we have Naomi of Straight into Bed Cake Free and Dried, and the creator of GAHIGF. In addition to this beautiful Raspberry Kleicha, Naomi also shared the touching story of her sister-in-law Lubna to whom this recipe is dedicated.


Next up, I made a Blueberry Cobbler in honor of early summer and simplicity. Quick and easy to make!
 

 Deb from An Aussie with Crohn's made this amazing Jam Sponge Roll- grain and dairy free! Looks so moist and delicious...
 

 Another first time contributor, Karen from Nourish with Karen shared her recipe for Raspberry Saskatoon Tarts -seemingly light and simple to make with few ingredients. I had never heard of a saskatoon, so will have to look out for it!


I decided to share one more recipe since our roundup was small this month - one of my favorites. Since we're gearing up for the fall, here is my No Bake Apple Crumble Bars. They are really easy to make and taste fantastic. Great for anything from breakfast to dessert!


 It doesn't look like there is a host for September, but look for October's GAHIGF at Healthy Indulgences with the theme of  Primal Sweets!

Thank you to the amazing women who participate this month!!


Pin It Now!

Monday, August 26, 2013

Blueberry Cobbler (Grain free, Egg Free, Dairy Free, Paleo)


We did a lot of blueberry picking this summer at a local organic blueberry farm that was amazing... we really enjoyed wandering the rows of various types and sampling the different flavors. One of the recipes I decided to make with them is a simple and easy blueberry cobbler.
 
I borrowed the filling recipe from my GF Blueberry Pie recipe that I love and miss since  going grain and egg free: GF Blueberry Pie. I think it's the perfect combination of tart and sweet and so delicious!

This is also one of my entries for this month's "Go ahead honey, it's gluten free" - "something fruity" that I'm hosting here! Check out my post here if you missed the announcement.

Blueberry Cobbler
(Paleo, Grain Free, Dairy Free, Nut Free, Egg Free, Soy Free, Refined Sugar Free)

Topping
2 Tbsp Chia flour/meal
1/2 cup Coconut Flour
1/4 cup Arrowroot Flour
4 Tbsp Coconut Oil
2 tsp Maple Sugar
1/2 tsp Vanilla
1/8 tsp Salt
1/4 tsp Cinnamon

Filling
3 cups Blueberries
1/3 cup Coconut Sugar
1 tsp Lemon Juice
1/2 tsp Organic Lemon Rind 
1/4 tsp Allspice
1/8 tsp Nutmeg
2 Tbsp Arrowroot or Tapioca Starch

Pre-heat your oven to 375*F. 

Mix your filling ingredients together and set aside to marinate a bit. Pour into a pyrex- 8x8 or 6x4 should work.

Mix your topping in a separate bowl and pour evenly on top of filling.

Bake in the oven for about 20 minutes. Let cool, then enjoy!


Pin It Now!

Tuesday, August 6, 2013

Go Ahead Honey August Announcement: "Something Fruity" (and paleo)!


I am pleased to announce August's theme for the oh-so fabulous "Go Ahead Honey, it's Gluten Free" roundup! This is actually my third time hosting this fantastic monthly event brought to us by the amazing Naomi Devlin.

This year Go Ahead Honey is all primal/grain free in addition to the normal gluten free fun which thankfully fits my diet even better! :) SO- This month's theme is what I like to call "Something Fruity" - in honor of summer and all things amazingly fresh and fruity, you can take it and run with it.

How to enter the roundup:

-Post a grain free/primal/paleo recipe for "Something Fruity" and link it to this post. Your recipe will need to be gluten-free and grain-free, but your blog does not have to be. If you do not have a blog you can email me your recipe with photo. If you have questions about ingredients don't hesitate to ask!
-Send me the link to your entry and a photo of it by August 30, 2013. My email address is byebyeglutenblog@gmail.com with the subject "Go Ahead Honey".

-Check back for the recipe round-up. I will try to get the recipes posted by August 31.

You can check out July's Go Ahead Honey Here for some ideas.


Here are a few of my favorite fruity treats I've posted (click on pictures for recipes):


Pin It Now!

Saturday, March 30, 2013

Egg Free/Grain Free Cinnamon Rolls (Paleo, Dairy Free, Soy Free, Refined Sugar Free)

I've been on a bit of a blogging break recently because of a host of new food and health issues that have left me scrambling to come up with basic meals for my family... Eliminating nightshades and eggs has been the most challenging changes, especially because grain free and egg free rarely go together!

Breakfast of course has always been a challenge, but recently especially because I've been relying on eggs so much. I saw a few pins recently on pinterest for cinnamon rolls (with eggs) and it's been a while since I've made them, so I thought I would give it a shot! So this recipe is dedicated to all those folks like me who need to be grain and egg free and finding it to be a bit tough :)

I shared this on my facebook page, but I highly recommend Benefit Your Life Almond Flour - I thought I was becoming intolerant to almond flour as well, but turns out it is only the pesticide-treated flours that I have difficulty with. The Benefit Your Life flour is similar to other blanched flours like Honeyville but without the added spraying of pesticide during the drying process.


Egg & Grain Free Cinnamon Rolls
(grain free/gluten free, egg free, soy free, dairy free, refined sugar free, vegan, paleo)


 Dough

Dry Ingredients
2 cups Organic Blanched Almond Flour
1/4 cup Organic Coconut Flour
1/4 cup Tapioca or Arrowroot Starch
1/2 tsp Baking Soda
1/4 tsp Cinnamon
1/8 tsp Sea Salt

Wet Ingredients
1/4 cup ground Chia Seeds mixed in 1 cup Water
1/4 cup melted Coconut Oil
1 tsp Vanilla or 1/2 tsp Powdered Vanilla
2 Tbsp Honey

Filling

1/4 cup Honey (1/2 cup if you like it more sweet)
1.5 Tbsp Cinnamon
3 Tbsp melted Coconut Oil

1/2 cup chopped Pecans (or other nut of your choice)
(raisins or chopped dates optional)

Pre-heat oven to 350 degrees farenheit.

In medium bowl, add chia seeds and water and whisk with a fork until starts to gel. Set aside.

Add dry ingredients to your mixing bowl and whisk/blend until well incorporated.

Add the rest of your wet ingredients to the chia mixture and mix.


Add the wet into the dry and beat with mixture until all the dough comes together.

On a Silicone Baking Liner/Silpat or parchment paper-lined jelly roll pan, roll out your dough until thin. If it sticks to your rolling pin, you can place another piece of parchment paper over it to roll, but I didn't have any problems with it. Or, your dough could be too warm and you could chill it a bit as well.

Mix the first three filling ingredients in a small bowl and spread over the dough. You don't need to be a perfectionist with this since it will be rolled. Sprinkle the pecans over the dough.

You can roll this two ways:

For smaller and more rolls, roll from the long side of the pan. This is what I did and prefer. Lift the edge of the silpat and gently pry the dough off to roll it. Continue to roll gently until you have reached the end. Then slice with a sharp knife into approximately 1" slices. If it sticks to the knife, wet it a little bit. Place flat side down on pan, evenly spaced. I had 16 rolls this way.

For larger rolls, roll from the short side of the pan. I have not tested this so I'm not sure how long it will take to bake.

Place in oven and bake approximately 15-20 minutes. Mine baked well at 18, but watch it carefully as the size of your rolls will change baking time. You want it slightly crispy on the top but not hard or dry.

Remove from oven when cooked and cool on baking rack for about 10 minutes until cooled and firmed some, but still warm and gooey. 


Frosting:
These are not overly sweet, so if you like, sprinkle some maple syrup over the tops, or I blended some coconut oil and maple syrup or coconut butter and maple, refrigerated it and made a bit of a frosting to put on top of some as well. I loved it as it is though, so if you have a sweet tooth, maple or more honey is fine to add either on top or inside.


Enjoy!!
Pin It Now!

Tuesday, January 22, 2013

Pickled Spiced Garlic


I've recently been playing around with various fermented/pickled veggies in an effort to help my digestion and add some extra naturally occurring probiotics into my life ;) So far I've made (some with greater success than others) Ginger Carrots, Fermented Sweet Potatoes, Sauerkraut, and Fermented Ketchup.  There's a lot of great info about such topics, and I'm no expert, so I won't even begin to talk about it, but two books  that I've found really helpful are Wild Fermentation: The Flavor, Nutrition, and Craft of Live-Culture Foods and Nourishing Traditions: The Cookbook that Challenges Politically Correct Nutrition and the Diet Dictocrats. These are amazing resources for assisting your gut to heal and protect it in the future as well with fantastic recipes and advice.

Anyways, it was fitting that for this month's "Go Ahead Honey it's Gluten Free" roundup, Naomi chose the theme of "Winter Pickles" for January. I decided to go ahead and give it a shot making up my own recipe, so hope it comes out well!! Check out the entire year's themes and hosts- it's going to be a great one! This year Naomi has decided to do just Primal recipes which fits my current dietary restrictions, so I'm quite excited! I will be hosting August, so look out for that as well...


Anyways, on to the recipe!

Pickled Spiced Garlic

2 heads organic Garlic
1 Tbsp Himalayan Pink Sea Salt
1 Tbsp Cumin Seeds
1 Tbsp Coriander Seeds
12 Green Cardamom pods (about 1/2 Tbsp)
1 dried Chili Pepper
1 tsp Fennel Seeds
1 cup White Vinegar

Bring seeds and vinegar to boil in small pot. Boil 1 minute. Add garlic (I chopped the really big cloves in half). Boil 1 minute with the garlic.

Pour into a pint size canning jar. Add approximately 1/2 cup filtered water or as much as is needed to bring it to just under the lid.

Let sit on your counter for about a week before transferring to refrigerator. The longer it sits in the refrigerator the stronger the flavor will be, but it should be ready to eat after a day or two in the fridge. I'm going to let mine sit longer though.

Enjoy with your favorite dishes as a side or mixed in with your meal. 


Pin It Now!

Thursday, November 8, 2012

Grain Free "Oatmeal"


I walked into my cold kitchen the other morning and all I could think was I wanted something warm and comforting for breakfast.... something like oatmeal.  Of course breakfast cereals are totally out of the question for me, but I remembered seeing some Paleo recipes here and there for "n'oatmeal" or other similar types of non-oatmeal. I looked around but none seemed too appealing. I try to cycle nuts and seeds and not rely on one or the other a lot, so I decided to use a mix of sunflower and pumpkin seeds.

Anyways, turned out pretty well! Definitely an oatmealy consistency and did the job. I used my Blendtec to blend it all for about 40 seconds. I didn't mind still having little bits in it since oatmeal itself has little chewy bits in it too.

*One other thing- I blended a cup each of sunflower and pumpkin seeds but only used half so that it would blend better and that I could easily/quickly make it another time.


Grain Free "Oatmeal" Breakfast Cereal
(seed mixture makes 2 batches)

1 cup sunflower seeds
1 cup pumpkin seeds (pepitas)
1 Tbsp chia meal (ground seeds)
1 cup Coconut Milk 
1 very ripe banana (mashed)
1 tsp cinnamon
1 tsp vanilla
2 tsp maple syrup 

In a blender or food processor, pulse or blend your seeds until a fine meal. (Don't overblend or it will turn into seed butter.) Mix it well.
 
In a medium size pot, add 1 cup of the blended seed flour (you will have 1 cup left over) with the rest of the ingredients and mix well. Turn on the heat and cook over medium heat for about 6-7 minutes until it has reached your desired consistency. If too thick, add more coconut milk.

Serve hot and top with your favorite toppings! I used a frozen organic berry mix from Trader Joe's and some slivered almonds on mine.


Pin It Now!