Showing posts with label sugar free. Show all posts

Saturday, October 19, 2013

Baked Apples (Grain/Gluten Free, Dairy Free, Egg Free, Soy Free, Paleo)


Other than the obvious pumpkin everything, nothing says fall to me like apples. Amazingly enough I didn't have my first baked apple until about a year ago so was pretty excited to recreate one at home based on our own tastes and needs...

This is really a recipe you can play around with, and I made two variations- with and without the pecans or using slivered almonds instead of whole. One time I made it I created a lot of extra filling and saved it as well so that I would have have it prepared for the next time I wanted them. I've eaten these for breakfast or dessert- a fantastic, healthy treat for whenever!

Baked Apples
(paleo, grain free, gluten free, soy free, egg free, dairy free, refined sugar free, vegan) 

Coring Apples
There are a few techniques for coring apples. If you have a corer like this one or this one
you can do it pretty simply, but I ended up just using a knife and once I figured out a good technique wasn't a big deal. I inserted my knife and carved a circle in each apple, making sure not to go all the way through. Then, i re-inserted the knife at a diagonal around the circle to remove the core. I then used a spoon to finish removing the core.
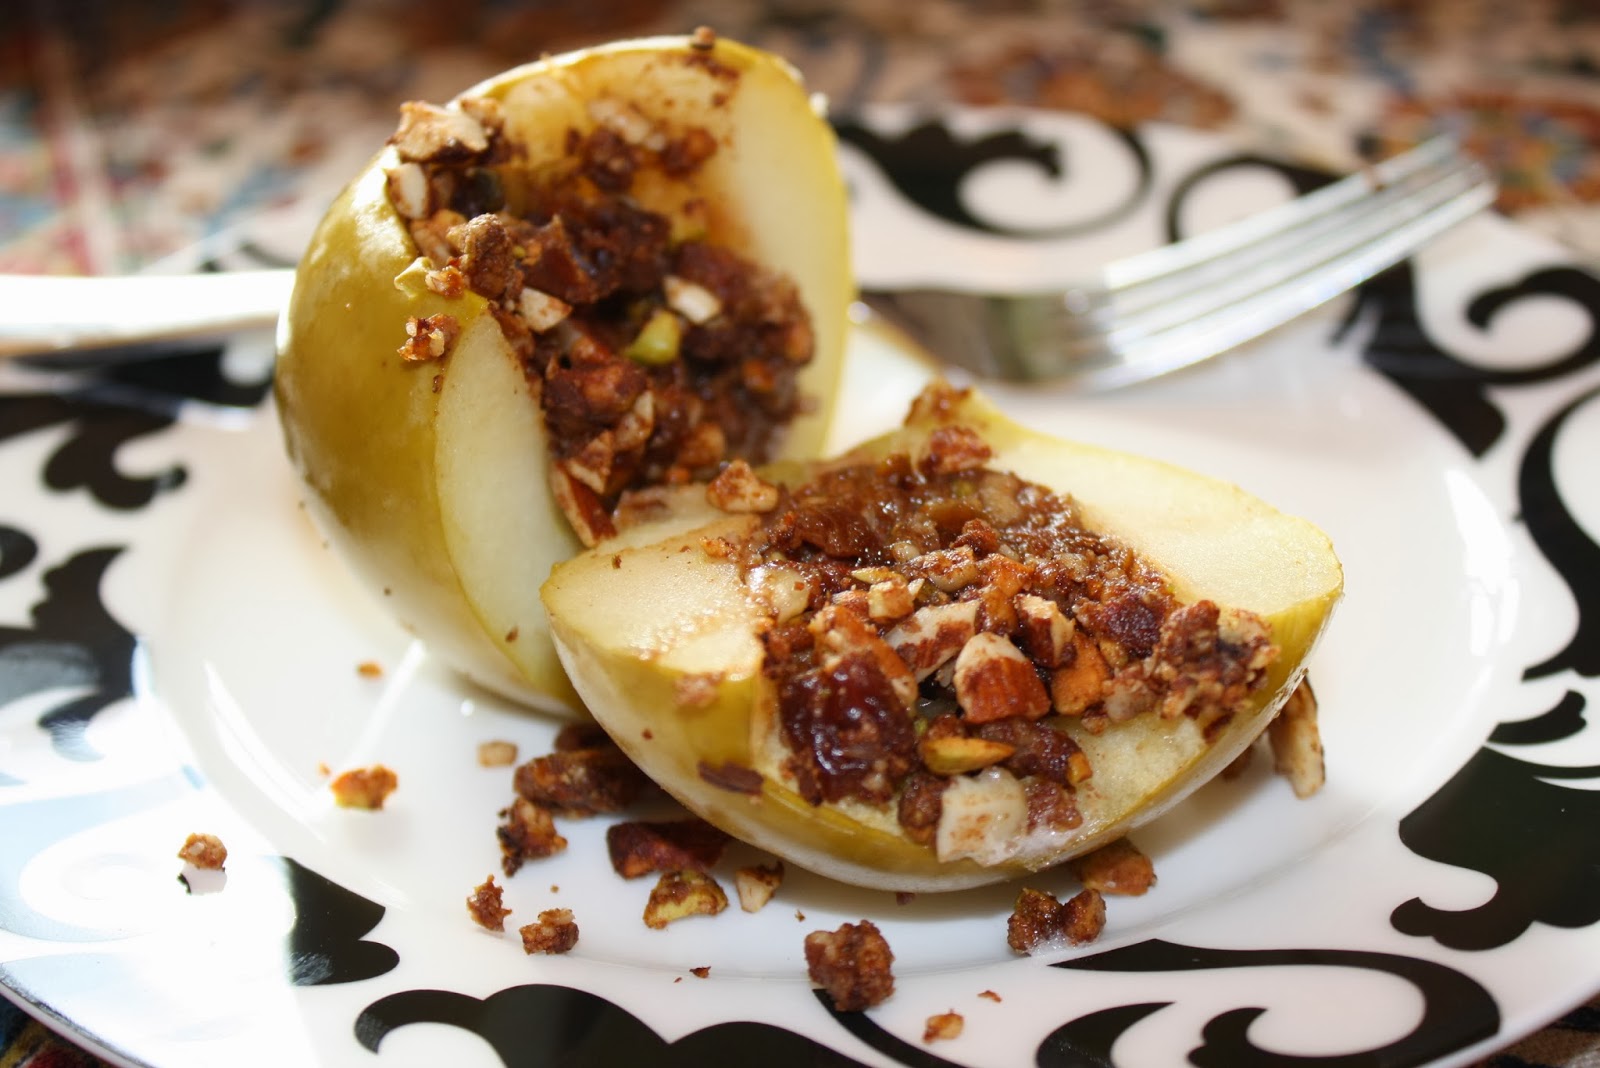


Filling

1.5 cups of pistachios, almonds, and pecans (or your favorite nut/seed blend)
6 dates, chopped
1 Tbsp maple syrup
1 tsp vanilla
1 tsp lemon juice
1.5 tsp cinnamon
1/4 tsp nutmeg
1/4 tsp salt
1 Tbsp coconut oil

Pulse all ingredients in a food processor until reaches your desired consistency. Sometimes I like it more chunky (like in the pictures), other times a finer sticky filling. Fill each apple with filling in a pyrex. If you like it a little sweeter, drizzle a little more maple over the tops.


Bake for 30 minutes at 375*F

Makes around 6 medium apples


Pin It Now!

Friday, June 28, 2013

Healing Candida with Food

I'm excited to share with you a great new e-book available entitled Healing Candida With Food. This fantastic book has over 130 recipes from 29 bloggers (including myself) and a wealth of knowledge about Candida. It also provides meal plans and more information on the topic for those who are wondering if this diet might aid them in healing whatever issues they might be going through.

I encourage you to check this book out and you won't be dissapointed!

Click on the picture below to purchase and learn more about this important topic.

Healing Candida With Food
Pin It Now!

Saturday, March 30, 2013

Egg Free/Grain Free Cinnamon Rolls (Paleo, Dairy Free, Soy Free, Refined Sugar Free)

I've been on a bit of a blogging break recently because of a host of new food and health issues that have left me scrambling to come up with basic meals for my family... Eliminating nightshades and eggs has been the most challenging changes, especially because grain free and egg free rarely go together!

Breakfast of course has always been a challenge, but recently especially because I've been relying on eggs so much. I saw a few pins recently on pinterest for cinnamon rolls (with eggs) and it's been a while since I've made them, so I thought I would give it a shot! So this recipe is dedicated to all those folks like me who need to be grain and egg free and finding it to be a bit tough :)

I shared this on my facebook page, but I highly recommend Benefit Your Life Almond Flour - I thought I was becoming intolerant to almond flour as well, but turns out it is only the pesticide-treated flours that I have difficulty with. The Benefit Your Life flour is similar to other blanched flours like Honeyville but without the added spraying of pesticide during the drying process.


Egg & Grain Free Cinnamon Rolls
(grain free/gluten free, egg free, soy free, dairy free, refined sugar free, vegan, paleo)


 Dough

Dry Ingredients
2 cups Organic Blanched Almond Flour
1/4 cup Organic Coconut Flour
1/4 cup Tapioca or Arrowroot Starch
1/2 tsp Baking Soda
1/4 tsp Cinnamon
1/8 tsp Sea Salt

Wet Ingredients
1/4 cup ground Chia Seeds mixed in 1 cup Water
1/4 cup melted Coconut Oil
1 tsp Vanilla or 1/2 tsp Powdered Vanilla
2 Tbsp Honey

Filling

1/4 cup Honey (1/2 cup if you like it more sweet)
1.5 Tbsp Cinnamon
3 Tbsp melted Coconut Oil

1/2 cup chopped Pecans (or other nut of your choice)
(raisins or chopped dates optional)

Pre-heat oven to 350 degrees farenheit.

In medium bowl, add chia seeds and water and whisk with a fork until starts to gel. Set aside.

Add dry ingredients to your mixing bowl and whisk/blend until well incorporated.

Add the rest of your wet ingredients to the chia mixture and mix.


Add the wet into the dry and beat with mixture until all the dough comes together.

On a Silicone Baking Liner/Silpat or parchment paper-lined jelly roll pan, roll out your dough until thin. If it sticks to your rolling pin, you can place another piece of parchment paper over it to roll, but I didn't have any problems with it. Or, your dough could be too warm and you could chill it a bit as well.

Mix the first three filling ingredients in a small bowl and spread over the dough. You don't need to be a perfectionist with this since it will be rolled. Sprinkle the pecans over the dough.

You can roll this two ways:

For smaller and more rolls, roll from the long side of the pan. This is what I did and prefer. Lift the edge of the silpat and gently pry the dough off to roll it. Continue to roll gently until you have reached the end. Then slice with a sharp knife into approximately 1" slices. If it sticks to the knife, wet it a little bit. Place flat side down on pan, evenly spaced. I had 16 rolls this way.

For larger rolls, roll from the short side of the pan. I have not tested this so I'm not sure how long it will take to bake.

Place in oven and bake approximately 15-20 minutes. Mine baked well at 18, but watch it carefully as the size of your rolls will change baking time. You want it slightly crispy on the top but not hard or dry.

Remove from oven when cooked and cool on baking rack for about 10 minutes until cooled and firmed some, but still warm and gooey. 


Frosting:
These are not overly sweet, so if you like, sprinkle some maple syrup over the tops, or I blended some coconut oil and maple syrup or coconut butter and maple, refrigerated it and made a bit of a frosting to put on top of some as well. I loved it as it is though, so if you have a sweet tooth, maple or more honey is fine to add either on top or inside.


Enjoy!!
Pin It Now!

Monday, June 11, 2012

Blueberry Walnut Breakfast Cookies (Gluten/Grain Free, Soy Free, Egg Free, Dairy Free, Sugar Free)


Breakfast has always been a challenge for me... and now I've had to cut out sugar the past couple weeks (except for a bit of fruit) which has actually been okay, but I do use dates in a lot of things, especially breakfast foods. I was trying to come up with an easy but tasty, not too sweet option. I saw a few recipes here and there that might work but they they still weren't quite right, so I combined a couple ideas and came up with these "breakfast cookies" or "biscuits" as we like to call them at home since our rabbit is named cookie :) Probably the most inspiration for these came from Against all Grain, so check her's out as well if you want something even sweeter or with eggs.

I have enjoyed making this recipe because it's a one bowl kind of recipe- I just throw it all in the food processor and it's only one thing to clean!

Blueberry Walnut Breakfast Cookies 
Gluten/Grain Free, Soy Free, Egg Free, Dairy Free, Sugar Free

1/4 cup Organic Coconut Flour
1/2 cup Almond Butter
1/2 large banana (approx 4 inches)
3/4 cup Organic Shredded Coconut
1/2 cup unsweetened apple sauce
2 Tbsp chia seed meal + 1/4 cup boiled water
1 1/2 tsp cinnamon
1 tsp vanilla
1/4 tsp sea salt
1/2 tsp baking soda
1/4 cup chopped walnuts
1/2 cup frozen organic blueberries

Preheat your oven to 350°F. Prepare your chia meal by adding the boiled water to the chia and stirring with a fork. Set aside. Place the coconut flour, almond butter, and banana in the food processor and blend until uniform. Add in the rest of your ingredients except the walnuts and blueberries and pulse until it is well combined. Add the walnuts and blueberries and pulse a few times just until incorporated. 


Take the dough and make approximately 2" balls in your hand and lightly flatten into 12 disks, placing on a large greased, parchment, or silpat-lined baking sheet. 


Bake in the oven approximately 15 minutes until the edges are golden. Cool on wire rack before eating then enjoy! These stay well in the refrigerator for up to 5 days or so and can be frozen as well. I enjoyed them straight out of the refrigerator or reheated in the toaster oven. I don't have a microwave, so no idea how they reheat in there!


Enjoy!


 This recipe is also being entered into the Friday Foodie Fix at The Whole Gang - this week's theme is Blueberries!!


Pin It Now!