Monday, April 26, 2010

Coconut Biscuits (gluten free, egg/dairy free, soy free, grain free)

My recent baking activities have been limited to trying out the many wonderful recipes that other bloggers have been producing- the result- less on my own creative side, but many wonderful treats created.  I'm hoping to post soon on some of my favorites that I've tried out recently.


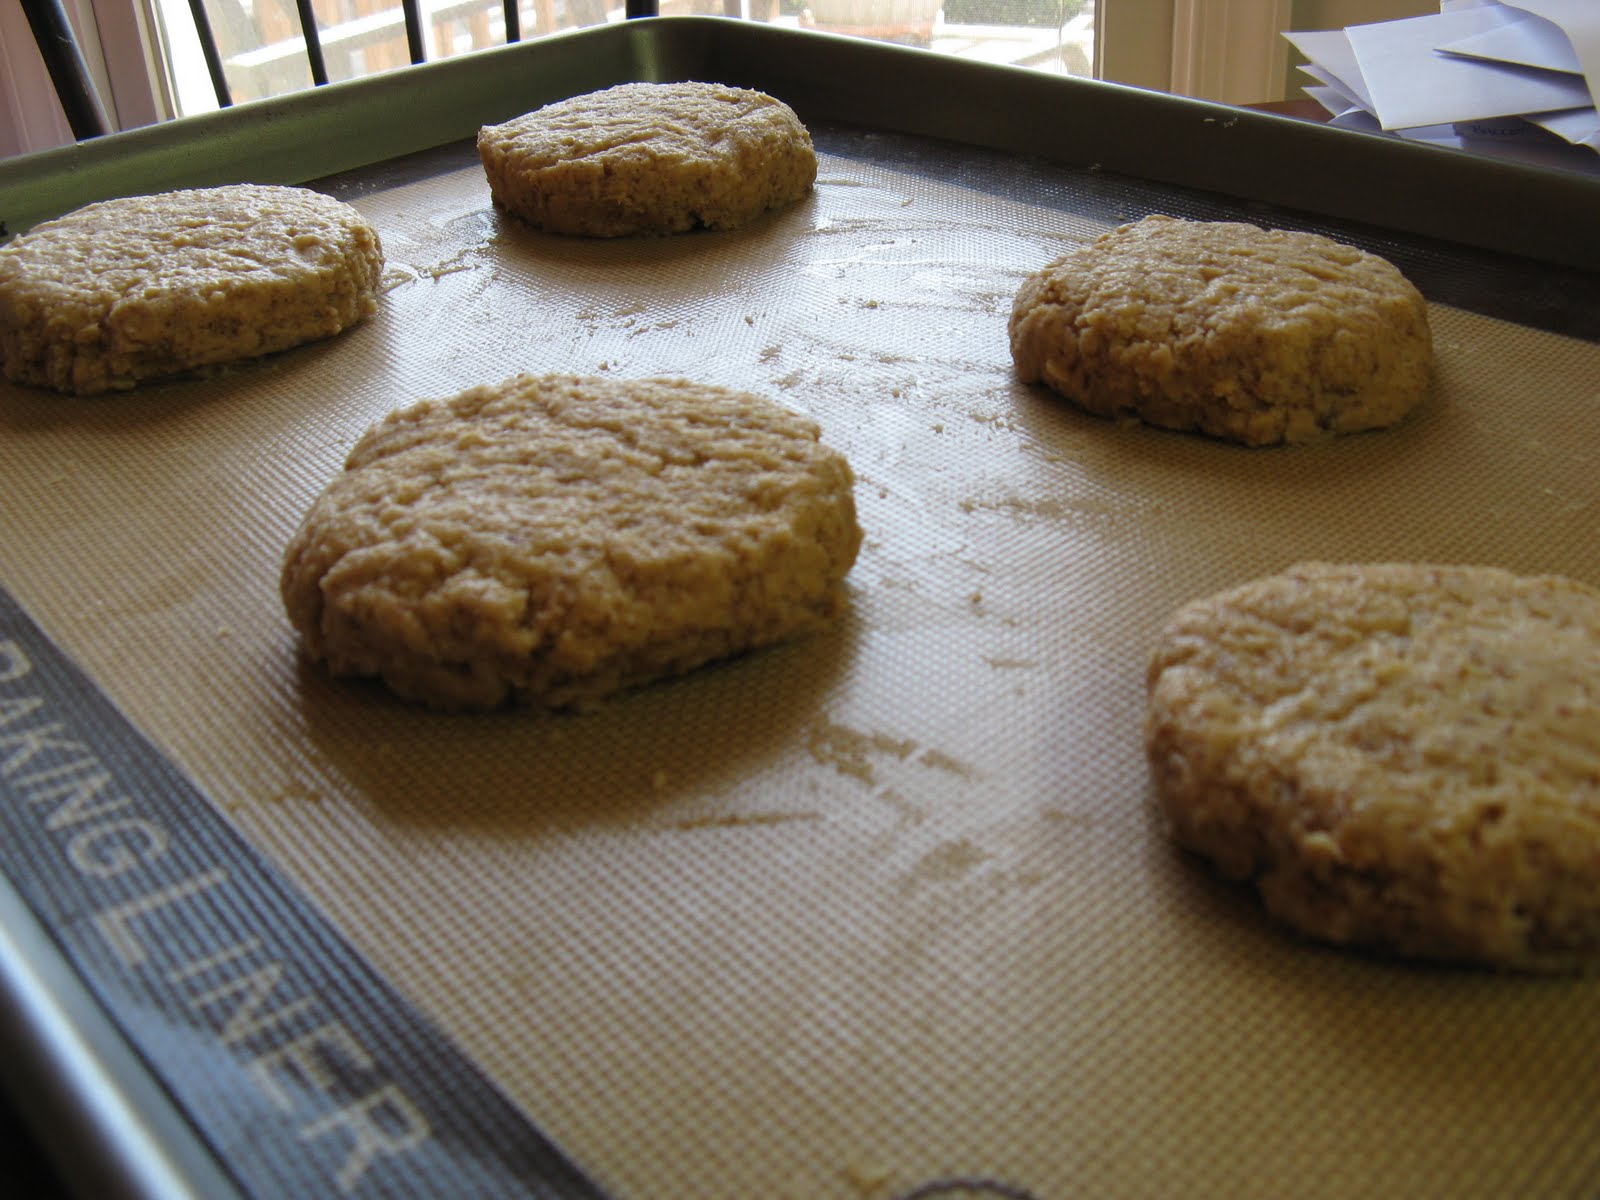
So for this month's 'Go ahead honey it's gluten free' (Breakfast in Bed theme) I decided to make a type of coconut biscuit/cookie/scone... whatever you wish to call it.  And really- it's not very coconutty, so maybe I should call it an almond flavored coconut biscuit ;)  Regardless of what you call it, I really enjoyed coming up with this recipe because it was REALLY simple to make, quite tasty, and a great snack, breakfast, or dessert.  The texture is really soft and chewy and they tasted even better the next day after sitting out.  There are no eggs, no grains, as well as the usuals, and sweetened just with dates and a bit of honey- pop it all into the food processor or blender and it's ready to go!


(Almond) Coconut Biscuits**

*leave out the almond extract if you're not crazy about the flavor, but I think it provides a great addition


3 Medjool Dates - torn in half, seeded
1/4 cup Boiling Water
2 Tbsp Ground Flax Seeds
1/4 cup Tropical Traditions Coconut Oil
1/2 cup Tropical Traditions Coconut Flour
2 tsp Vanilla
1/4 tsp Celtic Sea Salt
1/2 tsp Organic Almond Extract
1/2 tsp Baking Soda
1 tsp Baking Powder


Tear and seed your dates and place them flat on the bottom of your food processor (or blender).  Pour boiling water over dates.  Sprinkle Flax seeds and coconut oil in water as well.  Allow to sit for about 10 minutes to allow the dates to soften and flax seeds to gel while you gather the rest of your ingredients and pre-heat your oven to 375 degrees. 


Pulse your food processor until you have a creamy date mixture.  Add in the rest of your ingredients and mix until well blended - should happen pretty quickly.  Mix it by hand a bit as well just to make sure that the ingredients are well incorporated.


Scrape out your biscuits onto a silicone (Silpat) liner on a baking tray or well greased pan.  Arrange your batter into 5 biscuits using a wet spatula.  


Bake at 375 degrees for approximately 25 minutes depending on how brown you like them.    Although okay warm, I thought they tasted even better when cool.  Enjoy!


Pin It Now!

Friday, April 23, 2010

Tropical Traditions Coconut Oil Review

Anyone familiar with my tastes would know that I'm coconut crazy.  Especially being dairy free, coconut milk is one of my favorites.  I also use coconut aminos (like soy sauce), coconut vinegar, regular shredded coconut, coconut sugar, coconut yogurt, coconut ice-cream, coconut flour, and of course coconut oil. Call me coco crazy, but it's so versatile, healthy, and tastes great.

I was recently sent a jar of coconut oil by my new favorite company Tropical Traditions to review, and couldn't wait to try it out.  I've been using Nutiva Naturals coconut oil (I usually buy their largest jug), but I definitely saw a difference between the two.  What really stands out about Tropical Traditions' Gold Label Virgin Coconut Oil is its great texture.  It is smooth and creamy, and much lighter than other brands that I have tried.  The taste is great, and it also melts quickly for when you want it in liquid form.  I've used it in baking and cooking, as well as just a spread on things like waffles.  For people (shockingly) opposed to the flavor of coconuts, it is also very mild and the coconut flavor is not really detectable.  Overall I give TT two thumbs up for this product- they also run great deals on their products all the time including buy one get one free deals and more, so price-wise you can definitely be flexibly in your budget.

If you are interested in trying this or other products by Tropical Traditions, definitely take part in their Referral Program.  If you place an order with them as a first-time customer, please select “Referred by a friend” and in the box that says “How did you hear of us?” enter my sponsor ID number 5685168. By telling Tropical Traditions that I referred you, you will receive a complimentary copy of the book Virgin Coconut Oil: How it has changed people’s lives and how it can change yours! by Brian and Marianita Shilhavy with your first order! This book is filled with testimonies and research showing how healthy coconut oil is, and it also includes over 85 recipes showing how one can incorporate coconut into their diet.  I also get a free gift! :)

To see a recent recipe I created using this coconut oil, try out my Coconut Biscuits!

If you're still not convinced, I definitely recommend watching this video:

Disclaimer: Tropical Traditions provided me with a free sample of this product to review, and I was under no obligation to review it if I so chose.  Nor was I under any obligation to write a positive review or sponsor a product giveaway in return for the free product.

Pin It Now!

Friday, February 26, 2010

Butternut Lasagna - Gluten Free, Dairy Free, Soy Free

we recently went to a party where butternut squash lasagna was being served... i of course couldn't eat any, but my husband raved about it and i was intrigued.  i have always been a lover of all things with pasta, lasagna being one of my favorites.  i looked up a few recipes online but they all use tofu so that was a big no-no.

so for my recipe i made two layers- a butternut layer and a "creamy" layer: a bechamel-type filling.  it was a really rich lasagna, and quite frankly, you can't eat huge amounts of it because it's so rich, but tasty nonetheless ;)

one thing to note about the butternut layer- it's definitely going to taste different depending on the ripeness of your squash.  mine was a little old and not as soft as one in its peak.  canned butternut will also work (i like trader joe's), but it will be a little runnier than if you use fresh.

for my noodles i used tinkyada brand brown rice lasagna.  definitely watch your cooking time, and it should be al dente because it will cook in the oven more.  i overcooked mine this time and it stuck together and ripped apart a lot.  it works best if you cook it right before you're about to start layering, rinse with cool water and go. 


Butternut Squash Lasagna


Butternut filling

6 cups cubed butternut squash roasted in the oven with a dash of olive oil
1 tsp salt
1/2 tsp pepper
1/2 tsp ground sage
1 tsp nutmeg
1 Tbsp (or more if too thick) almond milk
3 Tbsp olive oil


Roast your butternut in the oven at about 400 degrees until soft- mine took about 20 minutes.  Once it is done, add all of the butternut filling ingredients into your food processor and blend until smooth and creamy (but not too watery). If you need more almond milk or olive oil, add it.  Remove from the food processor and set aside while you make your creamy filling.


Bechamel (creamy) filling

1 cup pine nuts soaked for a few hours
1 Tbsp nutritional yeast
1 Tbsp lemon juice
3 Tbsp olive oil
1 cup almond milk
1/2 cup sweet rice flour
1/2 tsp pepper
1 tsp salt

1 tsp garlic powder
1 tsp basil
1 tsp oregano


Drain your pine nuts and add them to your (clean) food processor along with the nutritional yeast and lemon juice.  Blend until smooth(ish).


In a small pot on the stove, heat your olive oil over medium-low heat and slowly add the sweet rice flour mixing it with the oil but not allowing it to burn. Stir for a few seconds and then add the milk slowly, stirring continuously (a wire whisk works well here).  Add the rest of the seasoning and cook for a minute or so to get rid of the floury taste.  Add the flour mix to the pine nut mixture in the food processor a little at a time, mixing in between additions.  once it is well blended, taste the seasoning- does it need more of anything? Also, is it too thick? If so, add more milk or olive oil.


Assembly:

I started with a light layer of the bechamel, followed by a noodle layer, butternut layer topped with bechamel, noodle, and then butternut topped with bechamel.  i sprinkled some more dried basil and oregano on top as well.


Bake in the oven at 350F until bubbly - i cooked mine for about 30 minutes.

Enjoy!


Pin It Now!

Friday, January 29, 2010

Veggie Quiche (Gluten free, Dairy Free, Soy Free)

i wanted something a little different for dinner the other night and had just seen kelly's post for her pie crust using mostly coconut and almond flours and was exciting to try it out! she also just added a video on how to roll out the crust here.

i recently ordered coconut flour from tropical traditions and love it. if you decide to order from them you can use my id#5685168 as a referral and i think you get a free book :) side note- if you sign up for their emails they run specials all the time and you can get good discounts and offers as well as lots of other great products.

side note#2- anne bradshaw is giving away a 32 oz jar of coconut oil here:
so go sign up and get one! :)

anyways- so i made kelly's crust. and it was p
henomenal. my non-gf husband described it as a "really really good pizza crust" but i really just loved the richness and savory flavor of it and it complemented the quiche well even though it was designed as a dessert crust. we might just have to try out a pizza on it sometime soon and see how it turns out...

i made a simple quiche using the veggies i had in the fridge, but of course you can add whatever you like. this is somewhat similar to my leek and asparagus crustless quiche/frittata
i only had 5 eggs left in the fridge, so you can also add
more if you like. or some sort of meat if that's what you're into :)


Vegetable Quiche


Crust
(copied from the spunky coconut)

Add to bowl:
3 tbsp flax seed meal
1/4 cup plus 2 tbsp applesauce
1 tbsp apple cider vinegar
8 drops vanilla creme liquid stevia
1 tbsp honey
1/4 cup coconut oil, liquified

Mix with electric mixer.

Add:
1 cup almond meal flour
1/2 cup coconut flour
1 tsp baking soda
1 tsp baking powder

Mix again.
Roll out the dough.
See: Video on how to roll out and transfer this dough. Or flatten the dough out slightly, so it's about 6 inches wide, then put it in the dish, and press it the rest of the way out with your hands.
(you can also lightly grease and flour the pie dish first, so the crust doesn't stick.)
Bake the crust at 350 degrees for about 10 minutes. You might be able to not bake the crust before baking the quiche. it depends on how crispy you like it, as mine was definitely well done around the edges by the time the quiche was cooked.


Quiche Filling

1/2 cup carrots chopped
7 stalks asparagus (or more)
2.5 cups fresh organic spinach leaves
1/2 cup red bell pepper chopped
1 tsp nutritional yeast
1/4 cup coconut milk drink or other dairy free alternative (almond, rice, etc.)
1 TBSP coconut oil
1 tsp Italian seasoning
1 tsp salt
1/2 tsp pepper
dash nutmeg
5 eggs (or more)

preheat the oven to 350.

heat coconut oil in pan and saute the bottom halves of the asparagus (cut into smaller pieces). reserve the top halves for the top of the quiche

add the carrots and saute for with the asparagus for a minute or so. add the seasonings. add the bell peppers. when the veggies have softened a bit add the spinach and mix for a few minutes until they are wilted.


while the veggies are cooking, beat your eggs with the coconut milk (or almond or rice).

pour the veggies into the crust and then add the eggs on top of the veggies. take the asparagus tops and make a design in the middle if you like (see picture).


bake at 350 degrees for approximately 35 minutes or until set. enjoy!


**Update: 2/15/10- i made this again and upped the eggs to 7, and switched broccoli for the asparagus and it turned out quite well... just another option!

Pin It Now!

Wednesday, January 6, 2010

Gluten Free, Soy Free Soy Sauce!


happy new year to all! i hope this year brings good, flavorful, and healthy eating to all!

i had to share a new product i just tried out- something i've been looking for for quite a while. for the gluten AND soy intolerant, there is little in the way of a soy sauce alternative. i have been trying to order the Miso Tamari from South River Tamari for some time, but they've been out of stock... so since i couldn't get that one, i recently bought Coconut Secret's Coconut Aminos. it's a new product that Whole Foods recently started carrying. note- not all stores carry them yet, and you might have to request it.


the company carries other products as well, such as coconut vinegar and coconut nectar (looks similar to agave nectar) but i haven't tried any of them yet.

so how does it taste? i have to say- it really is similar to soy sauce, but a bit sweeter, and less salty. i think these are actually good things- soy sauce is way too high in sodium, so the coconut aminos goes down a little easier.

now the con- the price. i paid a whipping $6.99 at whole foods in d.c. i'm hoping it comes down, because at this point this is going to have to be a special treat for me and not used in every dish or stir fry i make- more of an accent than main seasoning.

**update: 2/19/10- i bought another bottle recently at Roots Market in Clarksville, MD for a little over $5- much better!

so for my first tasting i had to make sushi... i miss having sushi with soy sauce so much and it was a great treat. being that i'm pregnant i did have to make a cooked sushi, so i did a simple carrot, cucumber, avocado, and shrimp roll. delicious! let me know if you try it and what you think!


Pin It Now!

Monday, November 30, 2009

Gluten Free/Grain Free, Dairy Free Cranberry Parfait


For this month's 'Go Ahead Honey, It's Gluten Free Challenge' (hosted by Elana of Elana's Pantry) I decided to accept the challenge to make a grain free dessert and decided to make something quite different than anything i've done before... but then after making it, I realized that the challenge was grain free cakes and cupcakes! Oh well... still enjoyed making it :)

I've always loved creamy foods, and without dairy, that's kind of challenging. So with this dessert I decided to take that challenge and was quite happy with the results!

This parfait took only about 20 minutes to make and tastes fantastic... it's creamy, a touch of tartness and pretty rich.

Grain and Dairy Free Cranberry Parfait


Cream

3/4 cup raw cashews soaked in boiling water
1/3 cup coconut cream
1 tsp vanilla
3 Tbsp honey or maple syrup
1 Tbsp melted coconut oil
1/4 tsp cinnamon
dash of nutmeg

Cranberries


1 cup fresh cranberries
1/2 cup crushed pineapple
2 tsp honey or maple syrup


Soak your cashews in boiling water in a covered container as you begin to prepare the cranberry mixture.

Place the cranberries, pineapple, and honey in a blender and puree until well blended.
Pour the cranberry puree into another container and rinse out your blender.

Add all of the cashew cream ingredients the blender and blend until creamy.

Layer your parfait in glasses according to your preference- the cashew cream is strong, so you might want thinner layers than I have in my picture. Eat immediately or place in the refrigerator to chill and firm.

*note- I have a regular old blender, not the Vita-Mixthat I pine over, so it is definitely possible to get a smooth cream from the cashews :)

Enjoy! Pin It Now!

Wednesday, July 15, 2009

Gluten Free Mango Upside-Down Cake


I have had this recipe bouncing around in my head for quite some time, and was going to make it for the 'Go Ahead Honey' theme of fruit desserts but was too busy to experiment. Anyways, I finally made this the other day and it turned out well. Of course the cake is gluten, dairy, and soy free, and uses sucanat and some agave to sweeten.

I liked the way it turned out- kind of dense and the fruit tasted great, but I think what I might do next time is to either put another layer of fruit in the middle, make 2 8" rounds, or one larger tin with a smaller cake. My reason for those options is that then you get more fruit along with each bite. Any of those or the way I made this one is fine, it just depends how much cake to fruit ratio you're looking for :)

One side note- I made this using Vance's Dari Free powder instead of a milk sub. I love this stuff. It's great if you don't feel like opening a new container of rice milk, almond milk, etc., and smells and tastes great. And i don't even like the taste of milk. So you're welcome to use this, or a little milk/milk sub if that's what you're into. The other thing I might change in the future is to use some almond meal as well, because it think the nutty flavor will go well with it. Or coconut flour.


Mango Upside-Down Cake
(gluten, soy, dairy free)


1.5 cups frozen (or fresh) mangoes (I used the frozen ones from Trade Joe's)
1/2 cup Sorghum flour
3/4 cup Millet flour
1/4 cup Tapioca starch
1.5 tsp Xantham gum
1 Tbsp Baking Powder
1Tbsp Vance's DariFree Powder
1/4 tsp Celtic Sea Salt
3 organic Eggs
1.5 tsp Vanilla
1/4 cup Grapeseed Oil
1/4 cup juice (I used Trader Joe's Orange Peach Mango Juice)
1/4 cup Organic Agave Nectar
1/2 cup Organic Sucanat+ 2 tsp for the bottom of the pan


-Preheat oven to 350 degrees F.
-Grease 8" round pan (I used canola spray)
- Sprinkle the 2 tsp of Sucanat across the bottom of the pan.
-Slice the mango into small chunks and lay out across the pan without disturbing the sucanat too much. Set aside.

-Combine all of your dry ingredients (minus the sucanat) in a small bowl and set aside.
- In your mixer bowl beat all of the liquid ingredients for a few minutes until well blended. Add the sucanat into the liquid ingredients and mix another minute.
-Add the dry ingredients to the went and blend until well incorporated. The batter should be somewhat thick.
-Gently pour the batter over the fruit in the pan without moving the fruit around too much.
-Bake for approximately 30-45 minutes, depending on your oven (mine is a little crazy right now). When a toothpick comes out clean, it's done.
-Flip onto a cooling rack and enjoy! Pin It Now!

Saturday, June 20, 2009

not gone!!


i know it's been a while, but hey- i've been busy :)

hopefully more updates in the next few weeks. Pin It Now!

Thursday, March 26, 2009

Throwing a Green Dinner Party


Now that spring is here, it’s time to start thinking about warm weather activities with friends and families. One of the most popular things to do once the temperature goes up is to host a delicious dinner party filled with food and décor that are inspired by the colors of the season and the fresh flavors that remind us of spring. To make things a bit more creative, consider planning your dinner around a theme to make the color scheme, table décor, and menu options tie in nicely together. A popular design idea for 2009 has been to go green by investing in eco-friendly product alternatives from the food we serve to our guests to the furniture we place in our home. With that being said, whip out your dinnerware collection and get started on your green dinner party today!

A dinner party wouldn’t be the same without invited guests but we want to stay away from sending out a pile of printed invitations and envelopes in the mail in order to reduce paper waste. It’s time to take advantage of the internet and send out personalized invitations via email to get an idea of the number of people that can attend your eco-friendly event. Next, consider making a conscious effort to be kind to the environment and plan your menu around locally grown ingredients such as fresh greens for your salad, or wild berries for dessert. Incorporate nature into your table décor by using organic materials for centerpieces or to decorate place settings. This is a great opportunity to include a fresh bouquet of flowers grouped together in a clear vase to create the perfect spring accent for your dinner party.

According to Planet Green, it’s a good idea to consider sticking with a vegetarian menu or one that includes sustainable seafood options instead of meat. Meat production has made a significant impact on climate change and the large amount of water that goes into producing even a pound of beef will leave you speechless. If you’re committed to throwing a green dinner party, stay true to the rules and apply the same green mentality to your dinner party menu. As mentioned above, purchasing locally grown ingredients will put you in the right direction as you are supporting your environment and you know exactly where your meals are coming from.

Pin It Now!

Monday, February 16, 2009

Easy Truffles - Go Ahead Honey February


february is a big month of celebration for us, with birthdays, valentine's, and Ayyam-i-Ha, and as such, involves just a bit of dessert :) for this month's 'go ahead honey' i decided to make something simple, healthy, and tasty for my sweet for valentine's. i was thinking about making truffles a few months ago and never got around to it, so i dove in for this month's theme of 'sweets for your sweetheart' hosted by kelly at the spunky coconut.


i must say, the recipe is really simple, but can be played around with. i just put what i was in the mood for since it was my first time experimenting with them. i've added in the end a couple of additions you may want to add to yours if you decide to make them. and by the way, i made these in about ten minutes, so it's not very time consuming!


Easy Chocolate Covered Truffles

3 Medjool Dates
2 Tbsp Chocolate Chips (I used Enjoy Life Foods Chocolate Chips) or your favorite chocolate
2 Tbsp Artisana Organic Raw Coconut Butter
1/3 cup Cashews
1 tsp Cocoa Powder (I used Green & Black's) - optional
2 drops clear Stevia

Directions:

Melt the chocolate chips and coconut butter together on low in a small saucepan.
While they are melting, add the cashews and dates into a food processor and pulse until they are completely cumbled and stick together. Mix in the cocoa powder and stevia if you're using.
Take out a teaspoon at a time of the mixture and press to form a ball. It should easily stick together.
Gently roll your balls in the chocolate mixture and place on wax paper. Refrigerate until they are cool and firm- it shouldn't take too long. Enjoy!


Other optional additions: add a 1/4 tsp vanilla, some chili powder, raw cacao nibs, or other nuts for fun. You could also sprinkle some pistachios, coconut, or other nuts on top of the wet chocolate.


Pin It Now!