Friday, June 24, 2011

Gluten Free Baby Edition Pt. 2 - Leftover Purees??

And now for part 2 of my gluten free baby post! :)

I made a wide variety of pureed fruits and veggies for my daughter and had them frozen in wonderful cubes (in these and these and these) and labeled, and had a great system... and then she started wanting more finger foods.  So I thought- how can I make this mush into something she can hold??  I also have issues with store bought snacks that are full of crap (see my first post here)

From many cubes of food I have now made little biscuits that she loves.  They're super quick and easy and you can adapt them to whatever you have around.  I now don't measure anything and just go by sight because it really doesn't make a huge difference in terms of taste and durability. I encourage you to play around with the idea and see how easy it is to make them!  The good part- they're not processed. No added anything, fresh and organic with no fillers or added sugar.

So here's the first recipe I made:
Homemade Baby Fruit/Veggie Biscuits

  ~3/4 cup organic vegetable puree (I used broccoli, string beans, and brussel sprouts)
1Tbsp mashed banana
1 Tbsp apple sauce/pureed organic apples (nothing added)
2 Tbsp coconut flour
dash of cinnamon

If frozen- put in pot and heat veggies just until warm. Stir in the rest of the ingredients and form into little biscuits (whatever shape you want) on a Silpat Baking Mat or greased baking sheet.

Bake at 375 degrees for about 15 minutes or until done.

Options- Depending on if you want a more savory or sweet biscuit, I have now started adding other ingredients/combinations:


This is the texture you're looking for- can stand on it's own but not too thick or runny


I used a piping bag for these

 -Almond Flour (great and nutritious addition to the coconut flour)
-Spices: depending on which veggies you're using
   ~cumin
   ~curry
   ~Italian herbs (pre-mixed, oregano, basil, marjoram, rosemary, etc...)
   ~coriander
   ~garlic powder
-Coconut milk/almond milk
-Baking powder


These I made with baking powder, coconut milk, almond flour, coconut flour, and brussel sprouts


*note- I still do give my daughter purees here and there. The more difficult foods to chew like greens, brussel sprouts, etc need to be pureed or they'll cause the child to choke! Pin It Now!

Friday, June 3, 2011

Gluten Free Baby Edition Pt. 1

Since I had a baby, many have been asking me what I plan to do about having her tested for celiac or if I've been feeding her gluten, etc...

This hasn't been an easy decision for me or my husband, so we're taking things slow, doing research, talking with our (experienced with CD) pediatrician, and being cautious.  I'm really not crazy about wheat anyways and all of the refined unhealthy forms that it comes in, so the urgency to introduce it is really not there.

Regardless of that, I had a tough time finding snacks for my daughter that didn't have added salt or sugar or empty fillers like rice and corn.  I know to a lot of parents these are not a big deal, but I really do think about everything I put into her body and whether or not it will provide nutritional benefit or not. I also consider the fact that nutritional excellence has a huge impact for children, and childhood is an important time for growth.  Yet so much of our food industry (like school lunches) is working against them, so the more I can do as a parent now, the better off they will be in being armed against what's out there when they go off to school and are bombarded by what is accepted as "kid food".

One big influence for me in considering these issues has been the book by Dr. Joel Fuhrman: Disease-Proof Your Child: Feeding Kids Right. I actually read this book long before I had my own, because I took a lot from it myself and ways to change my diet (before I went gluten free).  I am not a total fuhrmanite and don't follow his diet completely, but there is a lot of amazing advice, recipes, and guidelines for ways to help your entire family to enjoy good, healthy food without making it boring.

So- I totally digressed.  I was talking about snack food. I couldn't find anything. So I made some quick and easy snacks that I'll be sharing here and there. My daughter loves them and as a mom with very little time these days, I can throw something together for her quite easily.


My first project was a teething biscuit. I had already introduced gf oats and quinoa to my daughter, so I made biscuits out of each of those.  You can fiddle with the recipe to make different shapes, etc. These were actually kind of small, so shaping them as bars might be helpful as well. Water content will also change cooking time and softness so add more "flour" as needed.  These are mostly just recommendations for what you can do, so good luck! :)

Quinoa Baby Biscuits

1/4 cup Quinoa Flour
1/4 tsp cinnamon
1/8 cup pureed organic pear (I used some that I had made for baby food)
1/8 cup water
**1tsp coconut oil (see note)


GF Oats Baby Biscuits

1/4 cup certified GF Rolled Oats (blended into flour) or you can use preground Oat Flour
1/8 cup pureed organic pear
1/4 cup water
1/4 tsp cinnamon
**1 tsp coconut oil (see note)


Blend ingredients and put into mini muffin tray.  Bake at 375 degrees for approximately 15 minutes.  

*Note, the longer these stay outside the soggier they become, so don't make too many at once!

**Now that my daughter is older, I add in a bit of coconut oil to keep them from sticking to the pan


Packed up and ready to go! I love these little snack cups from Green Sprouts. You can order them here:

I also love these cups:


Pin It Now!

Tuesday, May 17, 2011

Mini Coconut & Almond Cakes (gluten/grain free, paleo, soy free, grain free, dairy free, egg free)


One afternoon I was craving a small "healthy" dessert as a snack, so I came up with this little coconut cake and was quite pleased with the results! It was small enough to satisfy my craving and delicious at the same time and the best part- I made it quickly while my daughter napped.  I ended up jazzing it up a bit (see the pictures) for dessert that evening for my husband and I as well, so you can eat it plain or with a little extra something!

I am also entering this recipe into this month's 'Go Ahead Honey it's Gluten Free' - 'Garden Tea Party'. It's the perfect little snack that you can whip up quickly and enjoy with a delicious cup of tea.


Mini Coconut & Almond Cakes

1/2 cup almond flour
1/4 cup coconut flour
1 Tbsp flax meal + 3 Tbsp hot water
1/2 tsp vanilla extract
1/2 cup coconut milk (room temperature)
1/8 cup raw honey
1/8 cup coconut oil (liquified)
1/2 tsp cinnamon
1/8 tsp salt


Whisk the dry ingredients together in a medium bowl.  Add the liquid ingredients into the dry and whisk until moist and incorporated. Pour batter into silicone cupcake holders.  Bake at 375 degrees for 25 minutes. They will appear soft until cooled.


I ate some plain and topped others with equal parts coconut oil and dark chocolate melted together and some toasted coconut. Delicious!


Pin It Now!

Monday, April 11, 2011

Cardamom Rosewater Tarts (gluten, dairy/casein, soy, egg, grain free)


i'm actually still experimenting with this recipe, but it tasted so good this way that i thought i would go ahead and post it!  cardamom and rosewater are very common flavors in persian desserts and ones i'm familiar with, but they aren't traditionally used in desserts like this one so i was excited to give it a try. the cashews are nice and creamy and go well with the simple but aromatic flavors of the dessert.

for a crust feel free to play around with it or use your own favorite raw or baked crust. the first time i made it i soaked my nuts overnight, rinsed them and drained them.  the second time i made it i just used plain raw nuts (see below-option 1 and 2). if you dry them out or don't soak them the crust will be different in terms of texture but still really good either way.

Cardamom and Rosewater Tarts


Crust
1 cup raw pecans, soaked, drained and rinsed
6 medjool dates separated (~3/4 cup)
1/2 tsp vanilla
1/2 Tbsp Coconut Oil

Option 1: Using the soaked nuts- Place all ingredients in a blender or food processor and pulse until smooth.  place in a bowl in the refrigerator and chill until cool.

Option 2: Use dry nuts- Place all ingredients in a blender or food processor and pulse until smooth.  Take a few tablespoons and press into Silicone Cupcake Cups (I made 8 with mine) and place on a tray in the refrigerator to chill until firm. Remove gently from cups and fill with cream.

Option 3: I baked a few of my crusts in the Silicone Cupcake Cups and they turned out well. If you don't want them raw, bake (on a tray) at 350 degrees for approximately 15 minutes or until darkened and firm. Cool cups on a cooling rack. When cool, gently remove from cups and fill with cashew cream.  Note- I had tried with the soaked nuts in a regular cupcake tin and  they stuck, so beware!

Filling
1 cup raw cashews, soaked, drained, and rinsed
3 Tbsp Coconut Oil(melted)
1.5 tspRose Water
3 Tbsp Raw Honey
5 drops Vanilla Creme Liquid Stevia
 (optional)
1/4 tsp vanilla
1/8 cup water

Blend all ingredients until smooth and creamy- make sure no cashew bits are left.  Place in a bowl in the refrigerator and chill.  When the crust is cool, form into mini tarts/bowls and fill with the cashew cream.  Top with crushed pistachios if you like and enjoy with a nice cup of tea.

(makes approximately 8 small tarts)

Enjoy!


Pin It Now!

Wednesday, April 6, 2011

Update: Soy free soy sauce!

Thanks to your comments as well as my dear friend Google Analytics, i know that my post on Soy (and wheat) Free Soy Sauce is interestingly, my most popular to date. So I thought I would update you all with some more info on the topic...

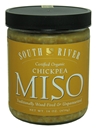
Coconut Secret's Coconut Aminos is definitely still fantastic and more widely available now, but I had also mentioned South River Miso Company which I finally did get to order from. 

They have two types of miso that are gluten and soy free: Chickpea Miso and Azuki Bean Miso.  These are good, and are aged 3 years.  They contain all sorts of vitamins, minerals, etc... I did notice these in My Organic Market as well.


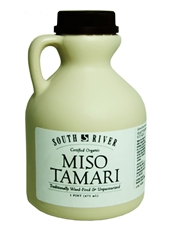
Their "soy sauce" is an Azuki Bean Miso Tamari that is light and sweetish.  If you have problems with beans or rice these are not the products for you (try the coconut one) but I just wanted to let people know they're out there.

Pin It Now!

Tuesday, January 11, 2011

Stuffed Whole Butternut Squash

i love stuffing vegetables. for some reason i wondered if i could stuff a buternut squash and decided to go for the challenge.

the result? it worked. just a little tricky.

here's what i did-  i scrubbed the squash well and baked it in the oven until half cooked, then cut off the top and scooped out the seeds with a long spoon. stuffed it and baked it until done.

the result? i loved it- the flavors were great and the butternut flavor got inside the whole thing.

you can use your favorite stuffing or use my black eye pea one below-this one is vegetarian. i have another one HERE too that has meat or you can always add meat to this one if you want it, but i don't think it's necessary.

Stuffed Whole Butternut Squash


1 large butternut squash, baked whole
1 C Dried Black Eye Peas (soaked and cooked) or 1.5 Cups cooked
1 small onion, chopped
3 cloves garlic, minced
7 mini peppers (about 1 cup chopped)
2 TBSP coconut oil
1 cup organic carrots, chopped
1.5 tsp rosemary
1 tsp sage
1 tsp cinnamon
1 tsp ginger powder
1 tsp salt
1/2 tsp pepper
1/2 tsp Italian seasoning
1/4 cup broth
1/3 C dried cherries
1/3 C slivered almonds


Bake your butternut squash at 400 degrees F until it is halfway cooked (approximately 30 minutes, depending on the size). Here's the tricky part- you're going to want 2 halves to stuff, but each half will need a slice to put on top after you stuff it. So- Remove from oven and cut off the neck leaving part of the neck closest to the bottom on to save as a top for the lower part. Carefully cut off a slice from the bottom half and save it. Scoop out the seeds. With the top half: cut off a slice from the top and save, then scoop out the middle using a strong spoon.
 
Saute your onion and garlic in oil until soft. Add in carrots, peppers, dried cherries, and your spices and cook a few more minutes. Add in broth and black eye peas and simmer a few minutes. Turn off and stir in your slivered almonds. If the stuffing appears too dry, add in some more broth.

Stuff the stuffing into your squash, and replace the top and secure with toothpicks. If you have leftover stuffing, stuff whatever other veggies or fruit you have laying around. Bake in 350 degree oven for approximately 45 minutes or until squash is tender.

Pin It Now!

Sunday, December 5, 2010

Creamy Wild Rice and Chicken Casserole (gluten free, dairy free, soy free)

I've been watching the food network a lot recently, and saw this recipe on the show Cooking for Real... It looked super tasty, so I decided to adapt it and make it gluten and dairy free and changed it up a bit.


One thing the original recipe had in it was mushrooms- my husband isn't a fan so I took them out and added spinach. If you want to add them, cook them down and add it, but I personally would keep the spinach- it makes a great addition and makes it much healthier :)  The other thing is that this recipe could very easily be made vegetarian- take the chicken out, add the mushrooms or maybe tofu if you're into soy.

To see the original recipe, click Here

Ingredients

  • 5 cups water
  • 1 sprig fresh thyme
  • 1 bay leaf
  • 2 TBSP sea salt
  • 2 boneless, organic skinless chicken breasts
  • 1 1/3 cups wild rice
  • 6 TBSP dairy free butter or coconut oil
  • 6 TBSP coconut palm sugar
  • 1 cup cranberries, fresh or frozen
  • 1-2 TBSP chopped fresh rosemary leaves**
  • 1/4 cup quinoa flakes, almond flour, or gluten free bread crumbs (I've used them all)
  • Salt 
  • 1 cup chopped organic carrots (2 large carrots)
  • 2 cups frozen organic spinach
  • 1 small onion, chopped
  • 2 cups coconut milk
  • 1/2 teaspoon ground cinnamon
  • 1-1.5 cups Daiya Mozarella "cheese"
  • Freshly ground black pepper

Directions:

Preheat the oven to 375 degrees F. Oil a 9 x13" casserole dish.

In a large saucepan, combine the water, thyme, bay leaf, and salt and bring to a boil over medium heat. Add the chicken and simmer until cooked through, about 15 minutes, depending on thickness of the chicken.

Remove the chicken to a cutting board. When cool enough to handle, dice into 1/2" cubes and reserve.


Return the water to a boil, add the wild rice, and cover. Cook over medium heat until the rice grains split, 40 to 45 minutes. Drain the rice in a colander and set aside.


In a large saute pan, over medium heat, add 2 Tbsp of your oil/butter. When the butter is melted add the brown sugar, cranberries, rosemary, quinoa flakes/bread crumbs, and a pinch of salt. Stir until the coconut sugar is dissolved and the mixture is uniform. Transfer to the pot you cooked the rice in and set aside.

In the same large pan over medium-high heat, melt 2 tablespoons of your oil/butter. Add the spinach, onions, carrots, mushrooms (if you're using them) and a pinch of salt. Saute about 5 minutes. Add the coconut milk and the cinnamon, bring to a boil, then reduce the heat and simmer about 2 minutes to thicken slightly. Add the Daiya cheese and mix to incorporate. Add the rice and chicken to the pot and stir to combine. Season the mixture with salt and pepper, to taste, then transfer it to the prepared casserole dish.


Spread the cranberry mixture evenly over the top of the casserole and bake until golden and bubbling, about 15 to 20 minutes. Remove from the oven and serve hot.

Enjoy!

**in the pictures i used dry rosemary, but that was only the first time i made it. since then i've been using the fresh and loving it much more! Pin It Now!

Monday, October 18, 2010

Cinnamon Skewered Lamb Kabobs


This summer has been a slow one for barbecuing on the grill for us, so in a last ditch effort before fall truly hits, I finally made a recipe I've been scheming for a while...  I figure it's still summer somewhere and we still have a few days of warmth left over here, so this recipe won't be in vain :)


I was inspired to make this recipe after we had something similar on a trip to Israel a few years back.  My husband had ordered a ground beef kabob called Kabob Halabi at a restaurant, and it surprisingly came out on a long cinnamon stick skewer. It tasted incredible and we thought it was a great idea. So- a few years later, I decided to make my own version of it, but with ground lamb.   My husband described this one as possibly the best thing ever created :) 


I used cinnamon sticks that are 6 inches long, but I would have preferred 12 inch ones to make it easier for grilling/preparing. I did find some online, but didn't have a chance to order them. The 6" ones I got from Costco.  The ground lamb I got at Whole Foods (New Zealand lamb), but if you can't find it, you can usually ask a butcher to grind lamb for you or find a halal grocer.


So here is the recipe (it's quite simple)- hope you enjoy as much as we did!!


Lamb Kabobs on Cinnamon Skewers


1lb ground lamb
2 Tbsp chives chopped finely
1/2 tsp cumin
1/2 tsp corriander
1/2 tsp ginger powder
1/2 tsp granulated garlic
1 tsp sea salt
1/4 tsp cayenne pepper
8 6" cinnamon sticks

Sprinkle your seasonings on top of lamb and stir with a spoon to break up the meat. Then mix with your hand until it is soft and sticks together. With one hand grab a meatball size piece and work onto your cinnamon stick. Dampen your hand to help the meat move better.

before grilling
I grilled my meat for 5 minutes, then turned after 2 minutes to the other side, 2 minutes the next side, and another 1-2 the next. All in all it was about 10-12 minutes total for a juicy but well done kabob. If you care about aesthetics, you can also cover the ends of the cinnamon sticks in foil to keep them from burning. Either way, the cinnamon will be nicely infused into the lamb.


  Pin It Now!

Friday, August 27, 2010

Creamy Almond Pudding (paleo, gluten free, soy free, dairy free, sugar free)

i have been on a bit of a "blogging maternity leave" for the past few months, enjoying the pleasures of being a new parent.  my hands have been quite full allowing much less time in the kitchen, however i have been plotting various recipes and watching tons of cooking shows getting inspiration :)

so right after i had the baby, my husband and i were watching iron chef and saw one of the chefs making an almond pudding.  of course it was based in heavy cream and had no recipe, so he started researching and came up with this recipe.  he made it twice for me while i was recuperating, as he found it is supposed to help with lactation and female reproductive health- especially your "ojas"- sanskrit for vigor- increasing energy, etc...

anyways, the original recipe was pretty watery and used turbinado sugar which was good- it's not overly sweet, but i wanted to try it out with dates and change a few things, and i like a thicker pudding.  of course i would say you can always make it thinner as well with more coconut milk or use the original recipe i linked to, this is just my variation :)

so if your ojas needs revitalizing or if you just enjoy a tasty creamy almond pudding, this recipe is for you!


Creamy Almond Pudding
(gluten/grain free, paleo, casein free, soy free, refined sugar free)


1 cup almonds soaked in 1.5 cups of boiling water
5 dates soaked in 1/2 cup boiling water
1 can coconut milk
1/2 Tbsp arrowroot starch
¼ tsp ground saffron threads dissolved in 2 tsp boiling water
1/2 tsp ground cardamom
1-3 Tbsp coconut palm sugar (depending on taste)
2 Tbsp toasted slivered almonds for garnishing

Soak your almonds in a bowl with the boiling water for at least 2 hours. Soak your dates in your blender or food processor with boiling water until soft.  Blend until smooth once soft.  Add the almonds and half of the water it soaked in to the dates and blend until smooth.  Slowly add the can of coconut milk and process again until smooth. 

Pour the contents of the blender/food processor into a pot and bring to boil. Melt your arrowroot starch in a little cold water and add to the almond mixture while stirring constantly. Turn down the heat and add the saffron, cardamom and palm sugar. Simmer on low, stirring, until the pudding is reduced and thickened (I think I reduced mine for about half an hour. If you would like it thinner, just add some more of the almond soaking water. Serve warm, at room temperature, or even cold, garnished with toasted almonds.  I even enjoyed this as a cold topping for some apple teff pancakes I made!


Pin It Now!

Monday, April 26, 2010

Coconut Biscuits (gluten free, egg/dairy free, soy free, grain free)

My recent baking activities have been limited to trying out the many wonderful recipes that other bloggers have been producing- the result- less on my own creative side, but many wonderful treats created.  I'm hoping to post soon on some of my favorites that I've tried out recently.


So for this month's 'Go ahead honey it's gluten free' (Breakfast in Bed theme) I decided to make a type of coconut biscuit/cookie/scone... whatever you wish to call it.  And really- it's not very coconutty, so maybe I should call it an almond flavored coconut biscuit ;)  Regardless of what you call it, I really enjoyed coming up with this recipe because it was REALLY simple to make, quite tasty, and a great snack, breakfast, or dessert.  The texture is really soft and chewy and they tasted even better the next day after sitting out.  There are no eggs, no grains, as well as the usuals, and sweetened just with dates and a bit of honey- pop it all into the food processor or blender and it's ready to go!


(Almond) Coconut Biscuits**

*leave out the almond extract if you're not crazy about the flavor, but I think it provides a great addition


3 Medjool Dates - torn in half, seeded
1/4 cup Boiling Water
2 Tbsp Ground Flax Seeds
1/4 cup Tropical Traditions Coconut Oil
1/2 cup Tropical Traditions Coconut Flour
2 tsp Vanilla
1/4 tsp Celtic Sea Salt
1/2 tsp Organic Almond Extract
1/2 tsp Baking Soda
1 tsp Baking Powder


Tear and seed your dates and place them flat on the bottom of your food processor (or blender).  Pour boiling water over dates.  Sprinkle Flax seeds and coconut oil in water as well.  Allow to sit for about 10 minutes to allow the dates to soften and flax seeds to gel while you gather the rest of your ingredients and pre-heat your oven to 375 degrees. 


Pulse your food processor until you have a creamy date mixture.  Add in the rest of your ingredients and mix until well blended - should happen pretty quickly.  Mix it by hand a bit as well just to make sure that the ingredients are well incorporated.


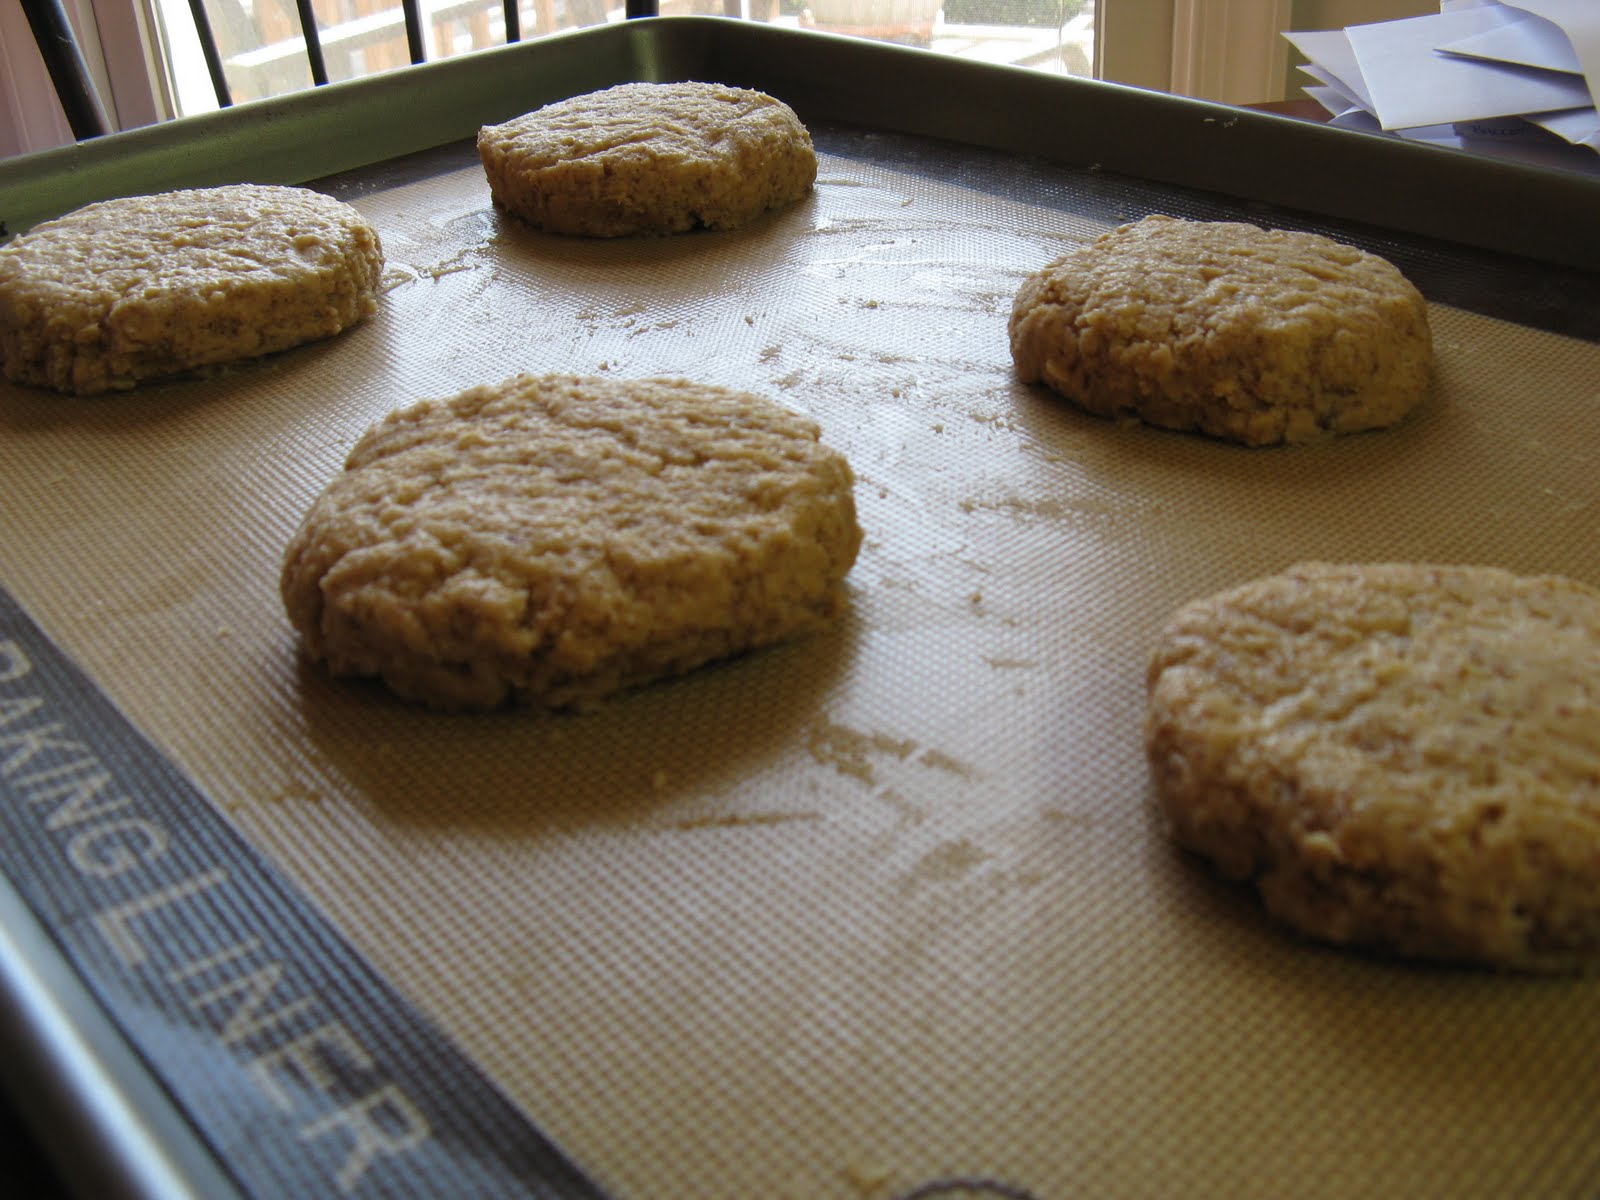
Scrape out your biscuits onto a silicone (Silpat) liner on a baking tray or well greased pan.  Arrange your batter into 5 biscuits using a wet spatula.  


Bake at 375 degrees for approximately 25 minutes depending on how brown you like them.    Although okay warm, I thought they tasted even better when cool.  Enjoy!


Pin It Now!